
This re-build, now completed,.... (scroll to the bottom to see the finished article), was originally started without a customer in mind. A short way into the re-build it was sold, and therefore finished to the new owners specification. However a recent change in the owner's circumstances have meant that we have been able to buy the loco back, and she is potentially available again, for sale.
This is Steam Workshop re-build No. 008. She is fully finished, tested and ready to play, and if you'd like to know any more then please do give us a bell on 07816 963463 for a chat.
We had this one in and for sale as a complete and running loco a little while ago, and although it was a little on the tired side, it was still a runner and therefore sold as a rolling restoration. We had considered a full strip down and re-build ourselves when it first came in, as a 3 1/2" LMS Jubilee is an extremely rare beast. Economically though it just didn't quite stack up. However, this time round when the loco came back into us, we decided it was bad enough, yet worthy enough to be given the re-build that it fundamentally deserved!
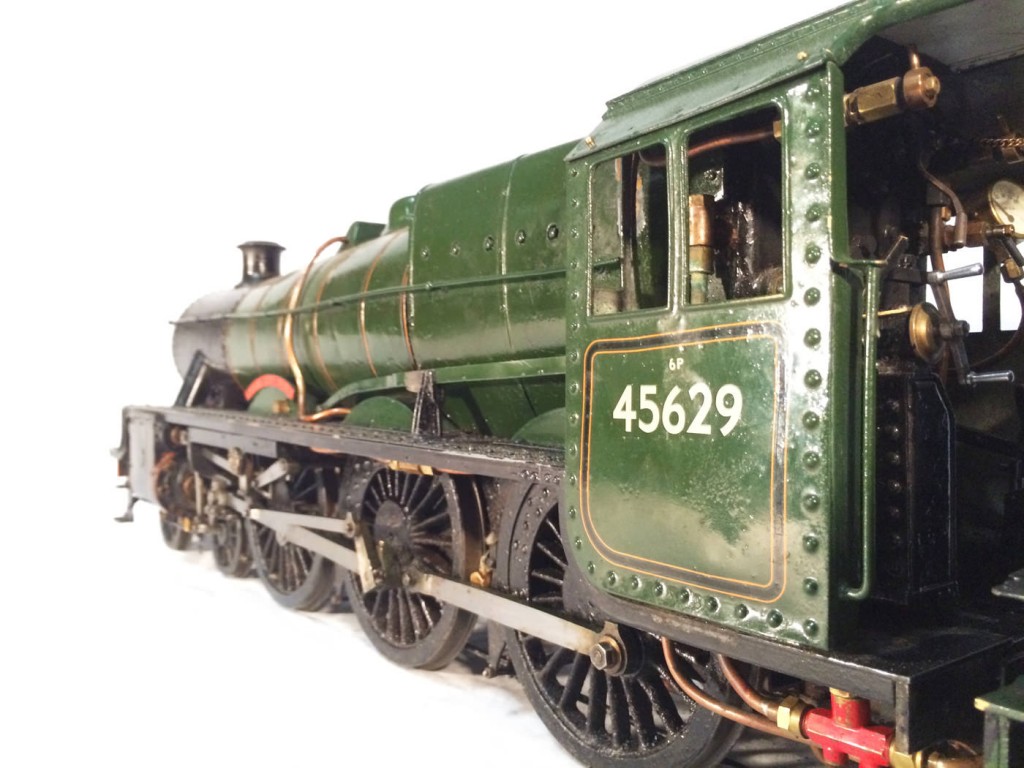
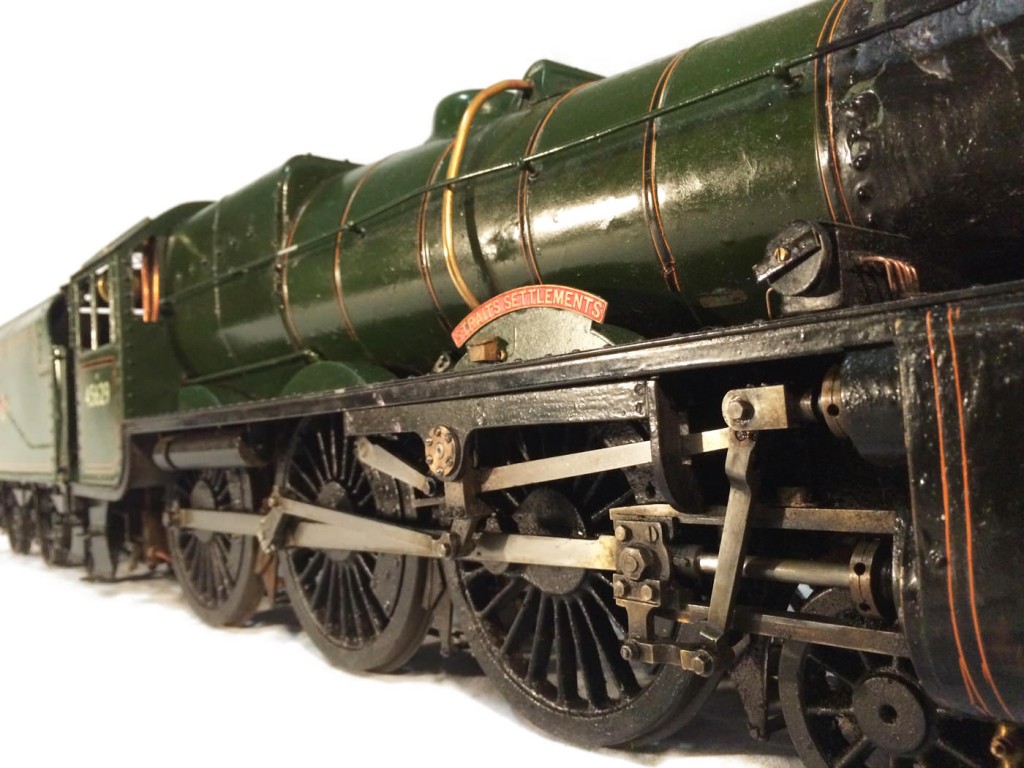
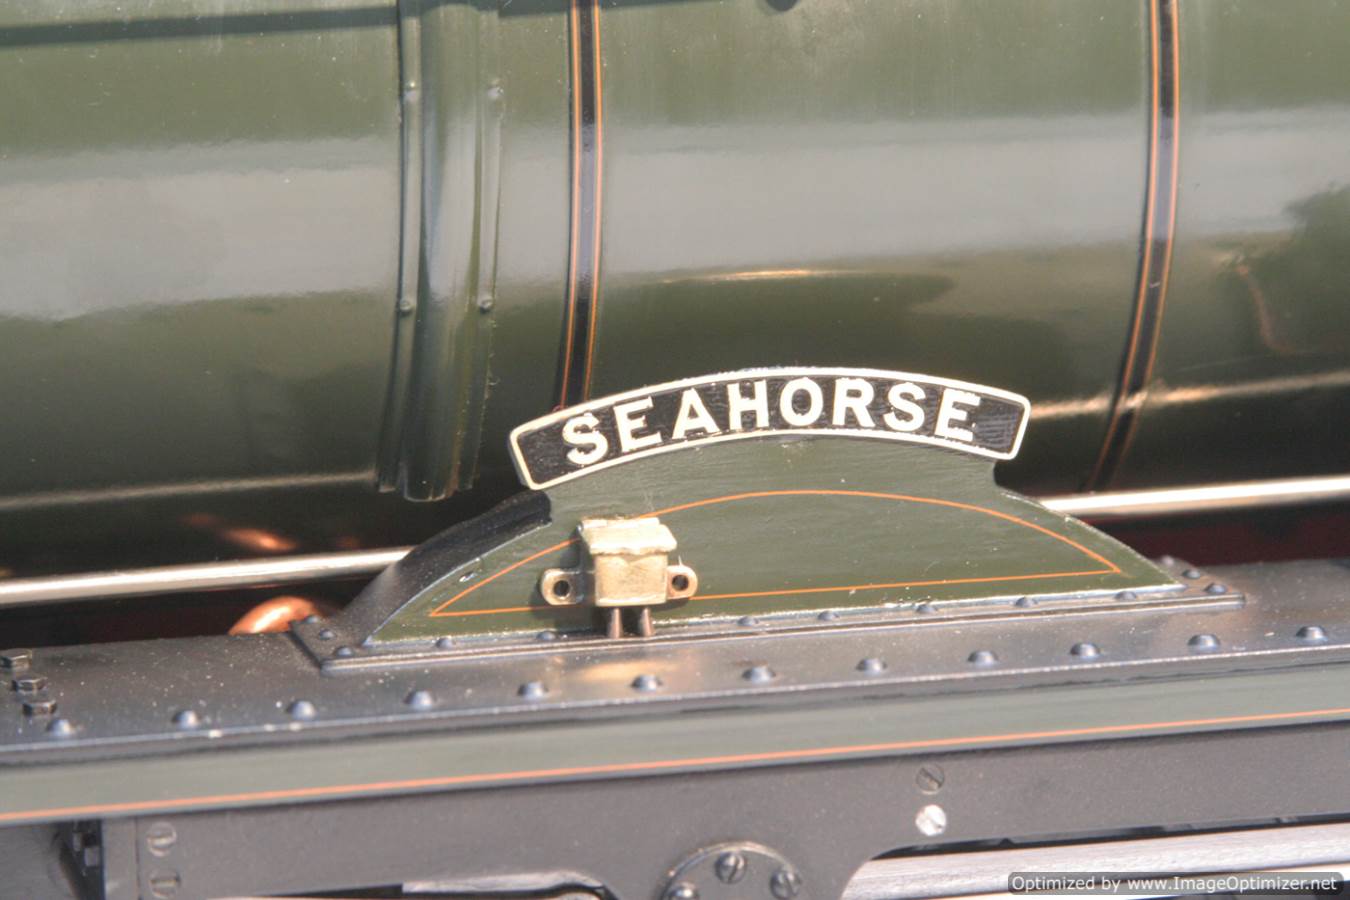
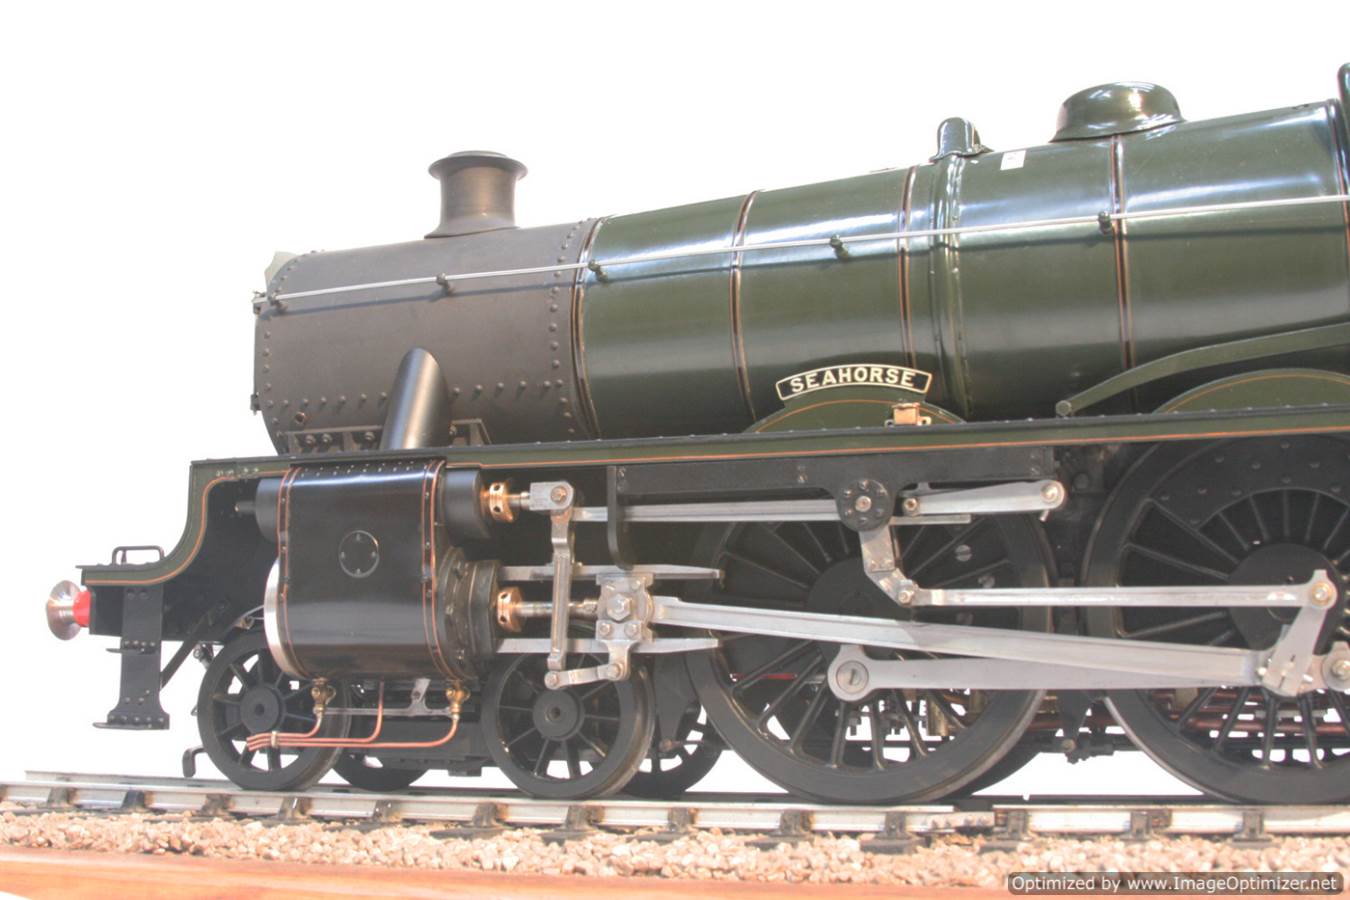
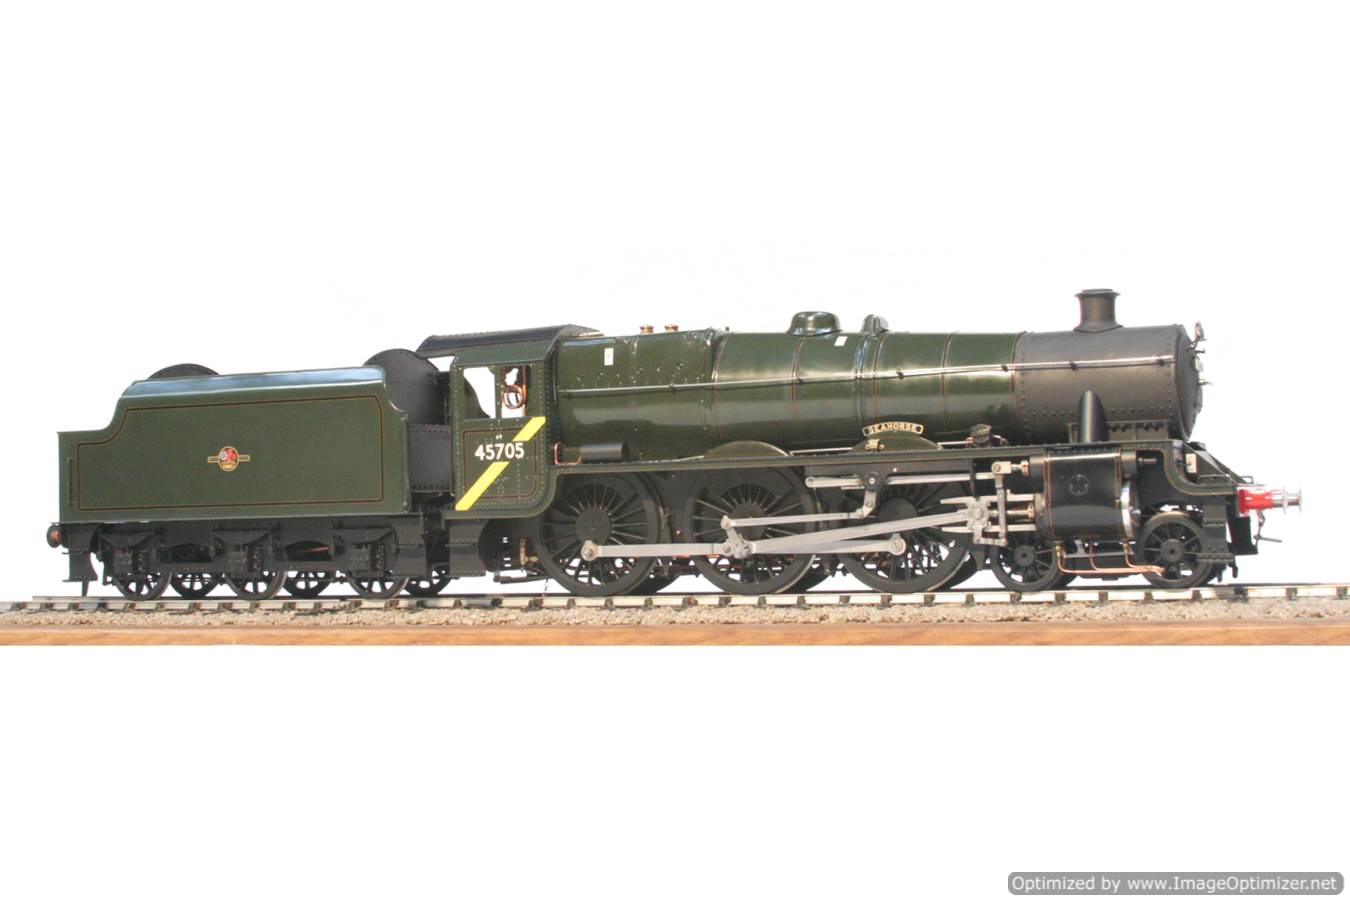
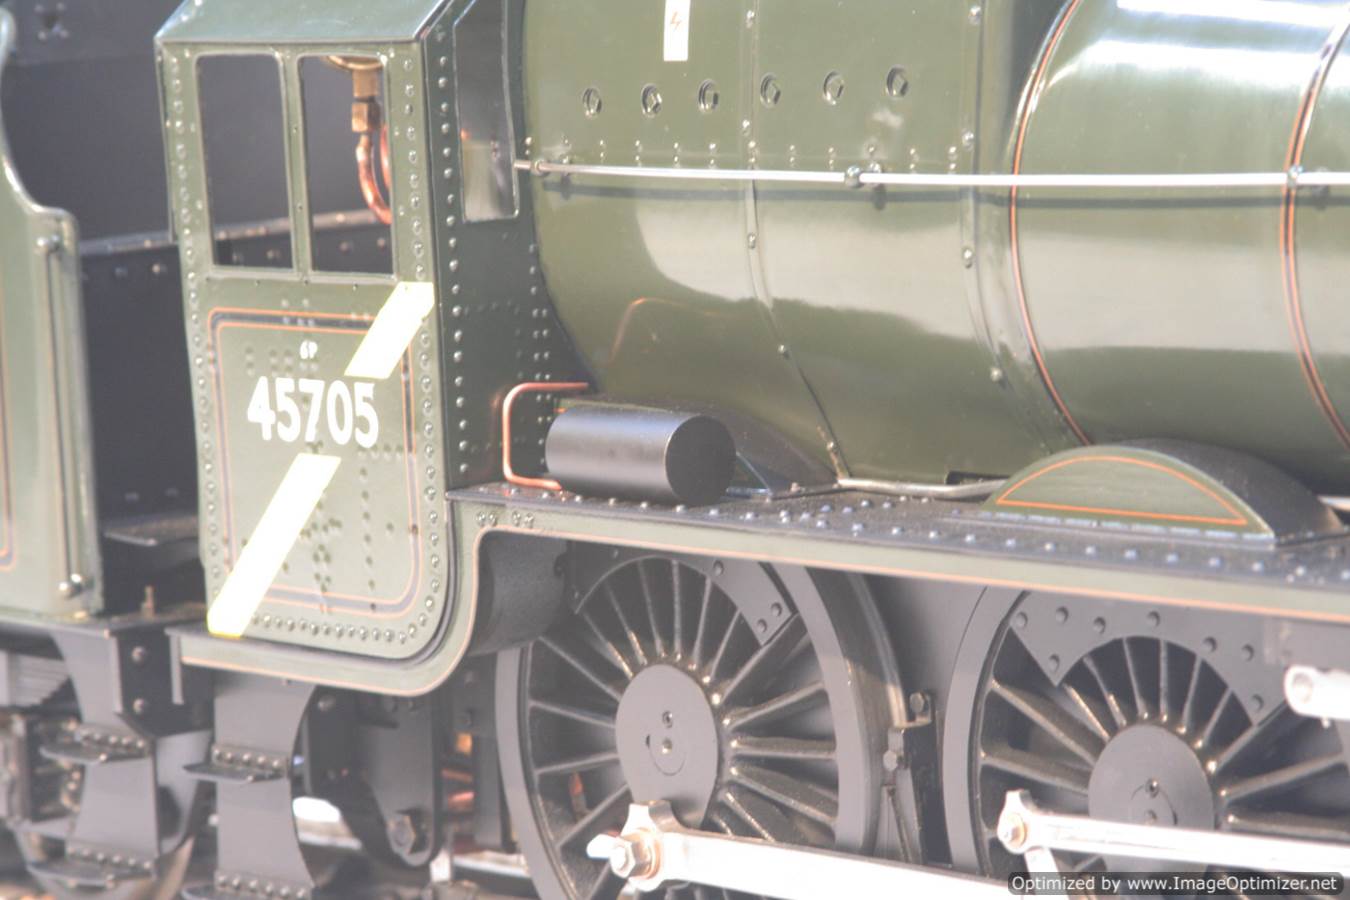
As with all our re-build projects, they are only really economically viable if the level of detail and finish is to a pretty high standard, to give the resulting model a value to match the time and effort involved in the re-build. Equally,..... we are enthusiasts and rivet counters here at The Steam Workshop, so only really get excited about projects if we can really go to town on them! This then is a little diary, blog, gallery if you will, to follow the progress of our rebuild upon this lovely, if VERY tired 3 1/2" LMS Jubilee. Originally 'Straits Settlements, but now, to the new owner's specification, (as he wanted a Manchester Jube, in BR Green with a yellow cab stripe and welded tender........) 'Seahorse'.
So,.... first things first,.... full strip down, paint strip, bead blast and clean up!
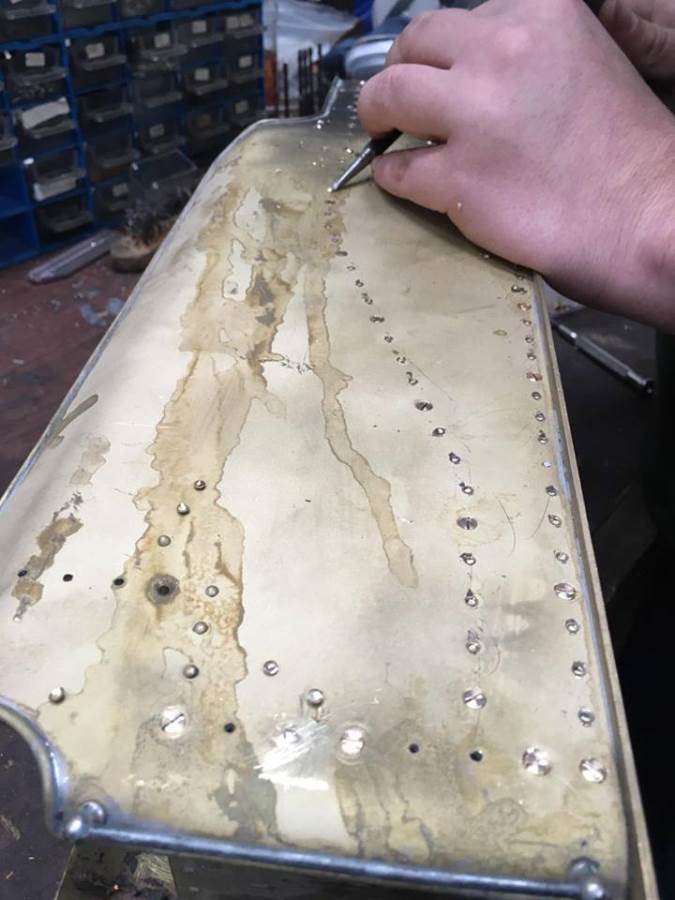
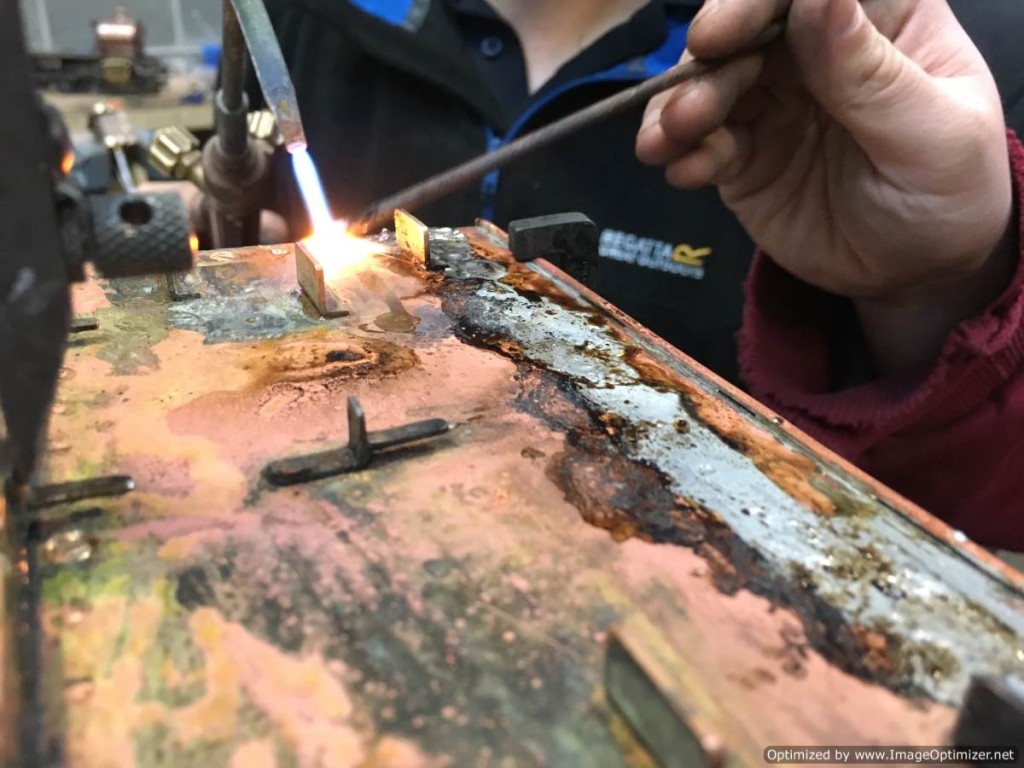
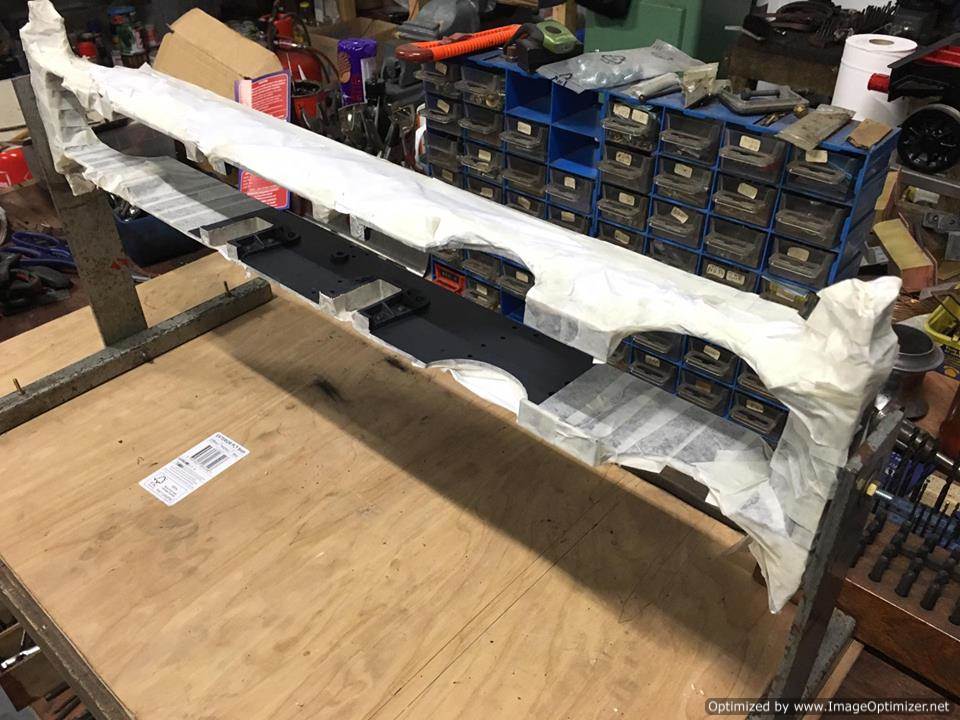
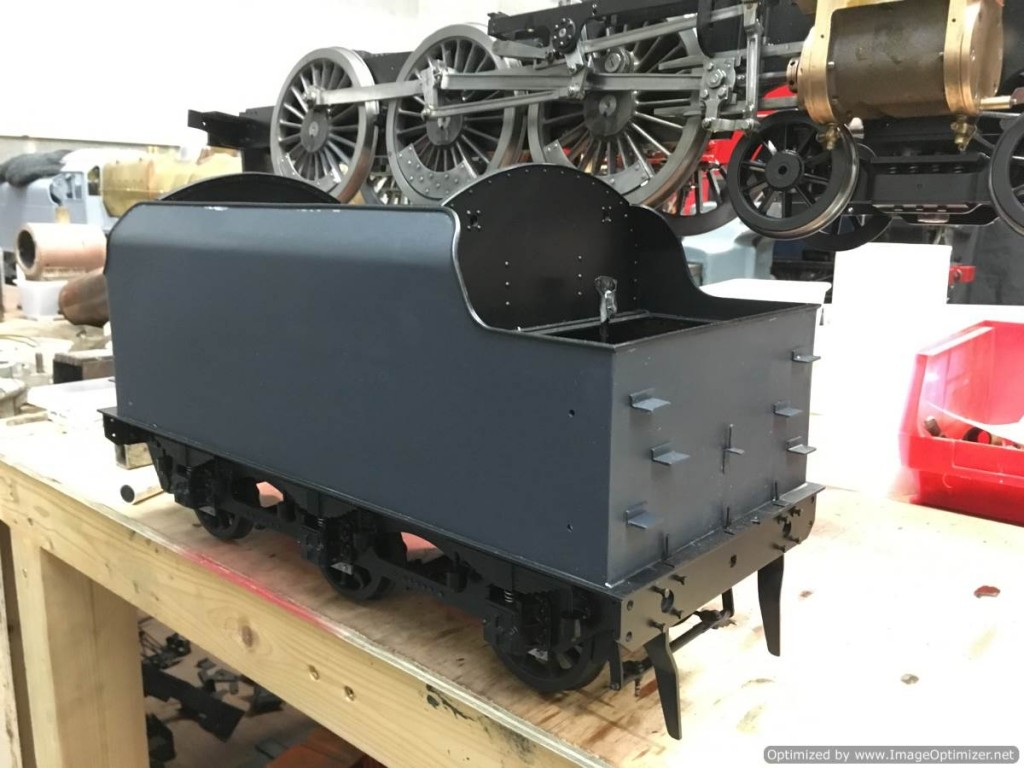
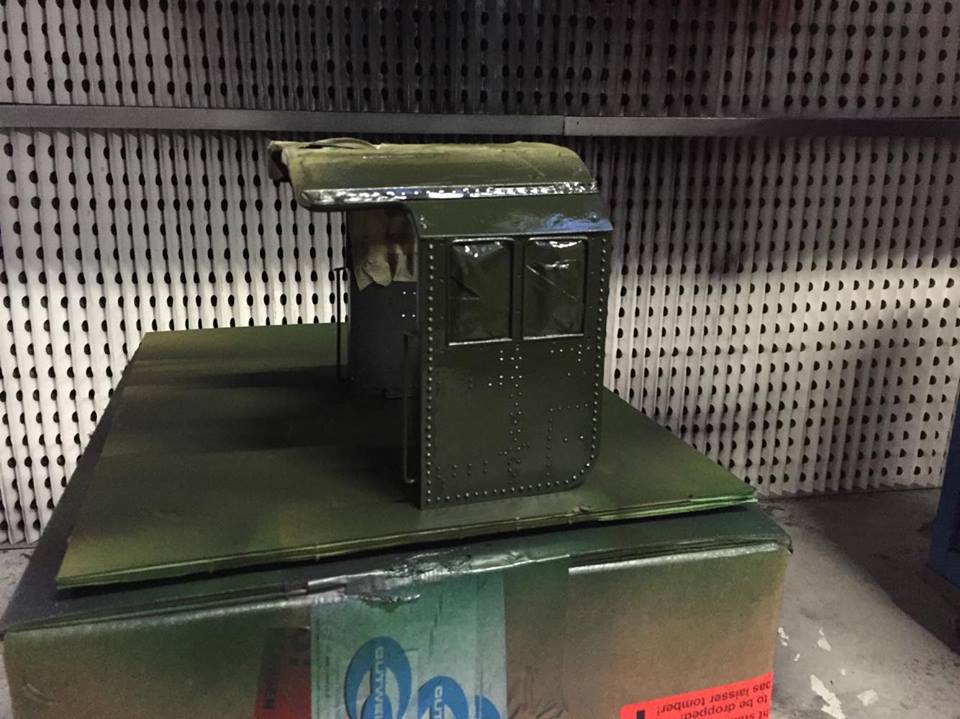
The tender body was riveted in a model engineering/non prototypical style, so we took the decision to remove the rivets. The structure was then held together with a countersunk screw every 4th hole, with the rest of the rivet stubs being filed flush and flooded with solder. The solder was then scraped and sanded flush, before the whole thing was ready for priming.

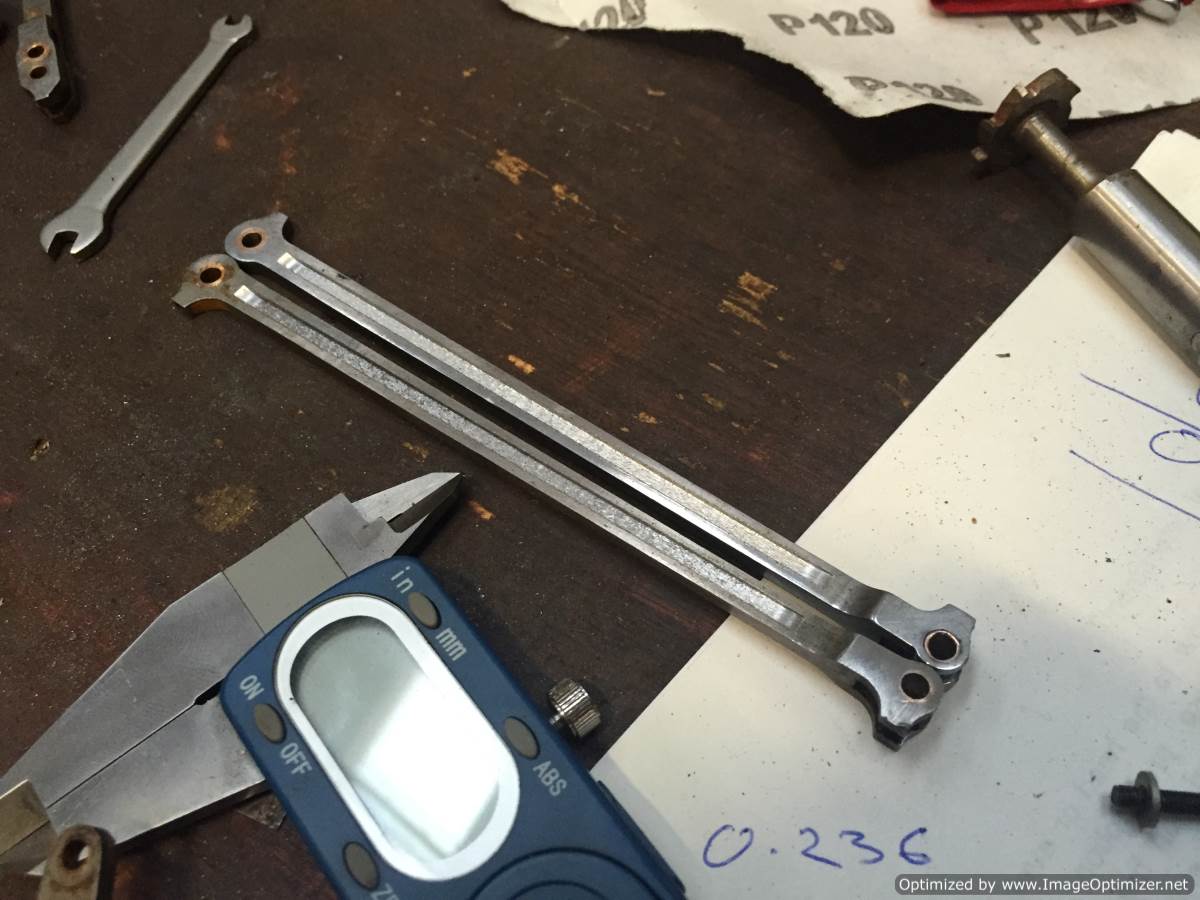
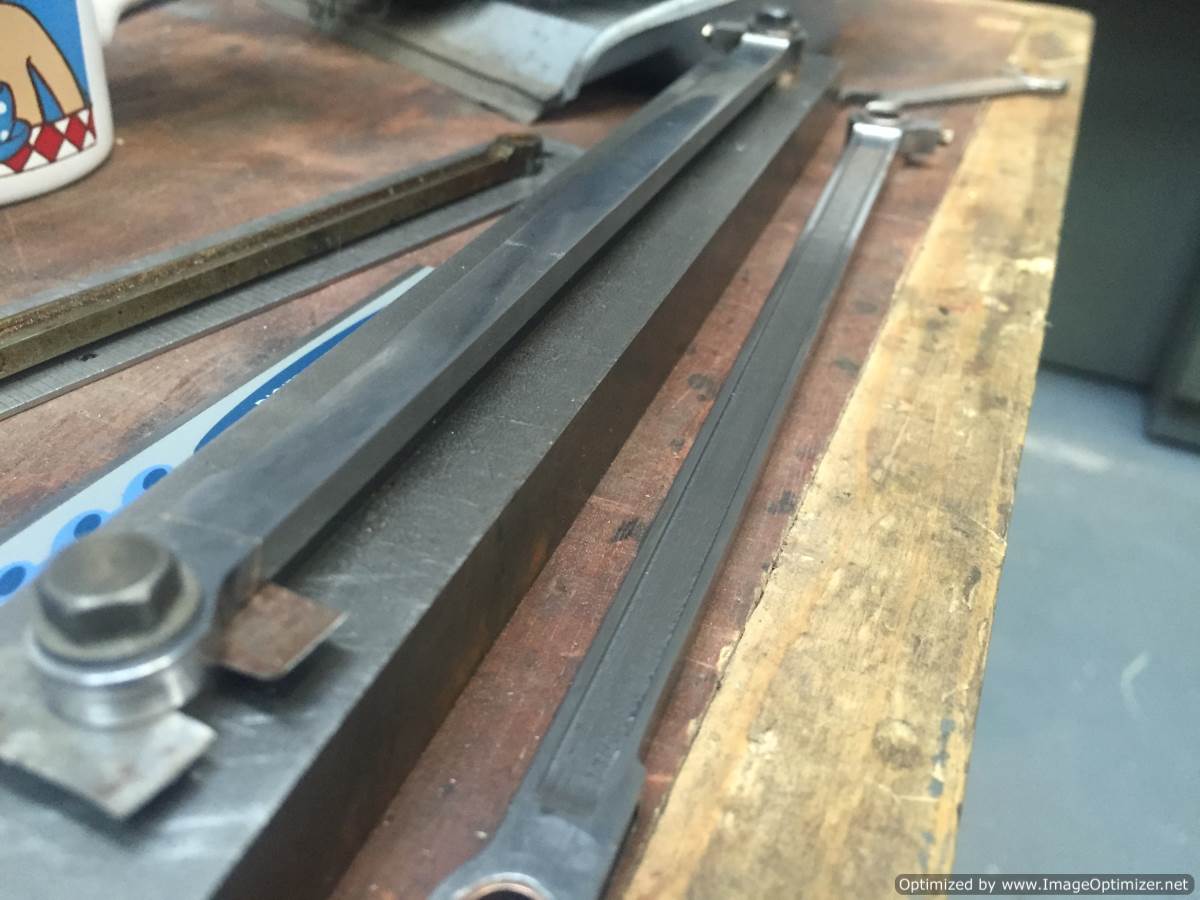
Next up, the valve gear, although nicely made, didn't have the correct fluting detail in the right places. so we set too to re-machine the existing rods to a more prototypical finish.
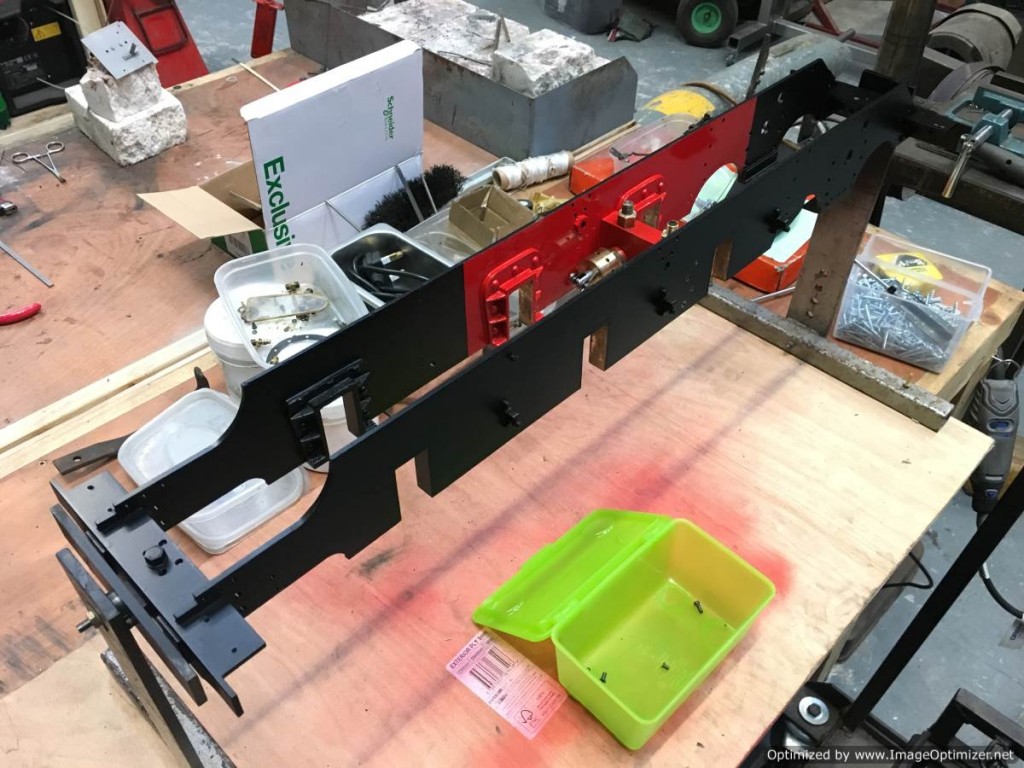
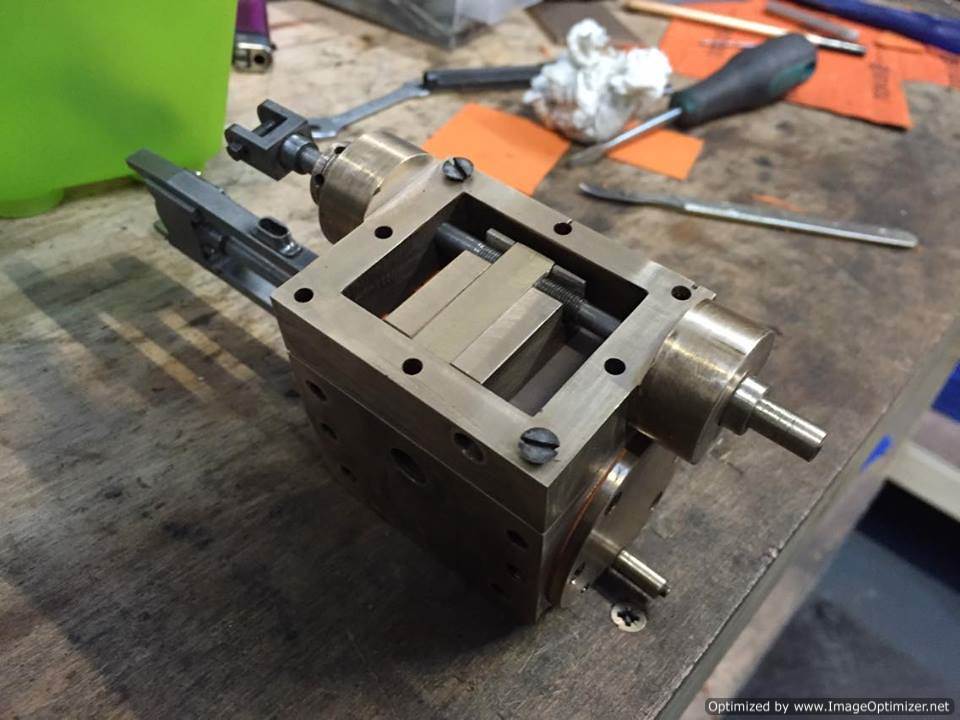
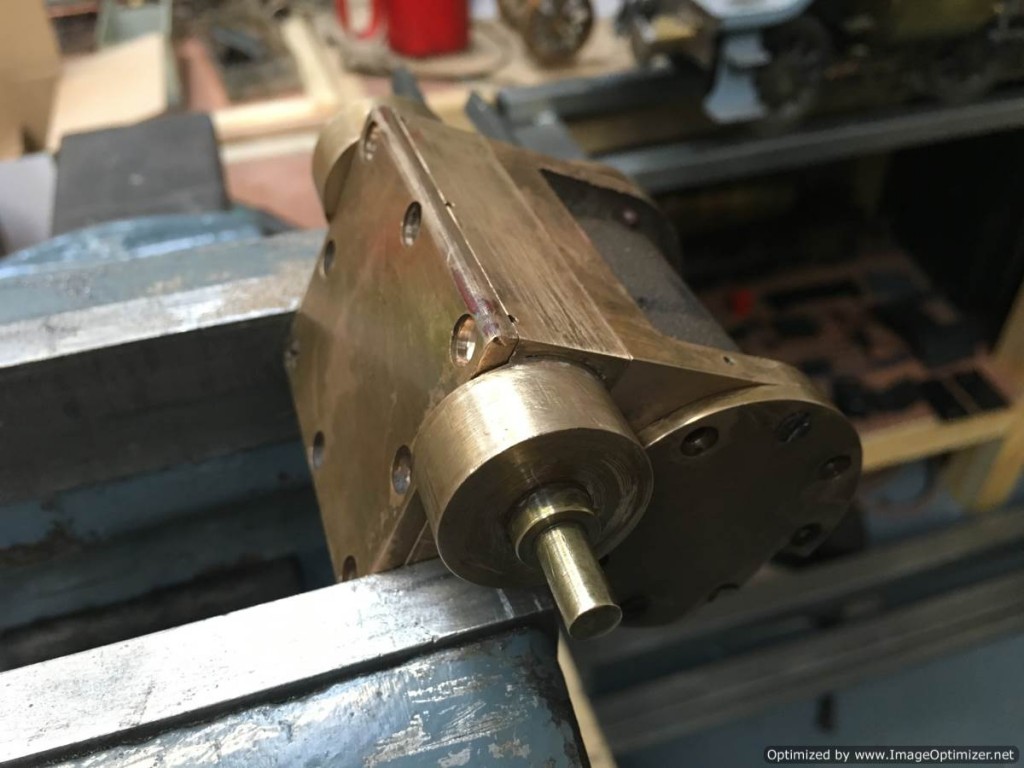
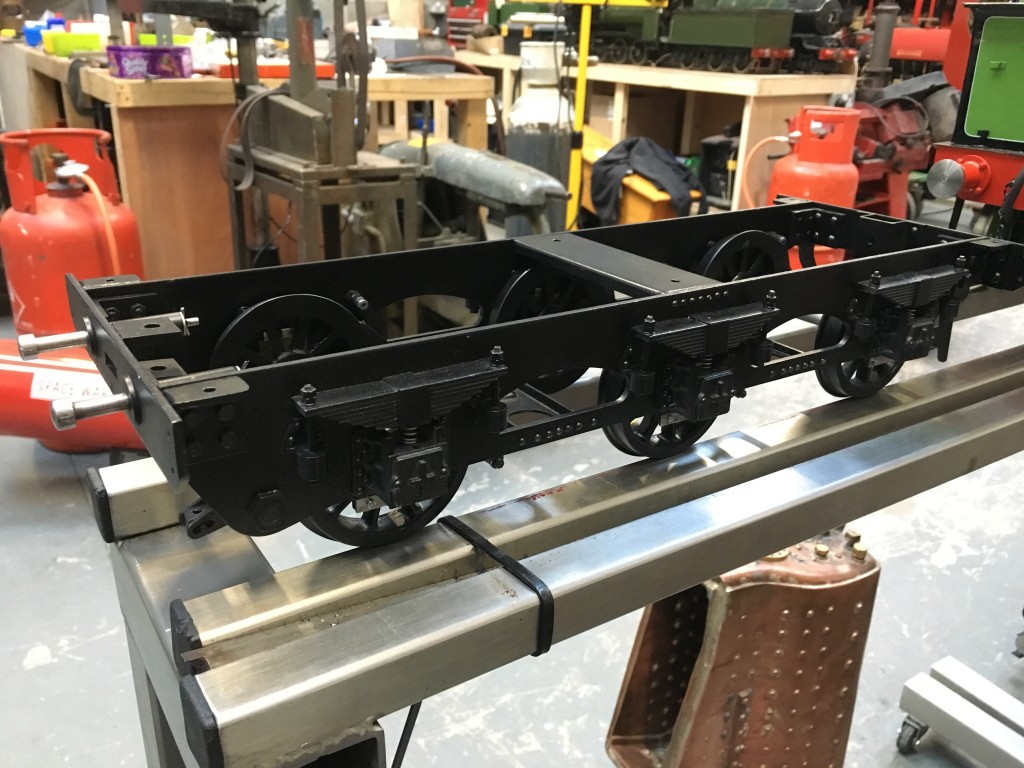
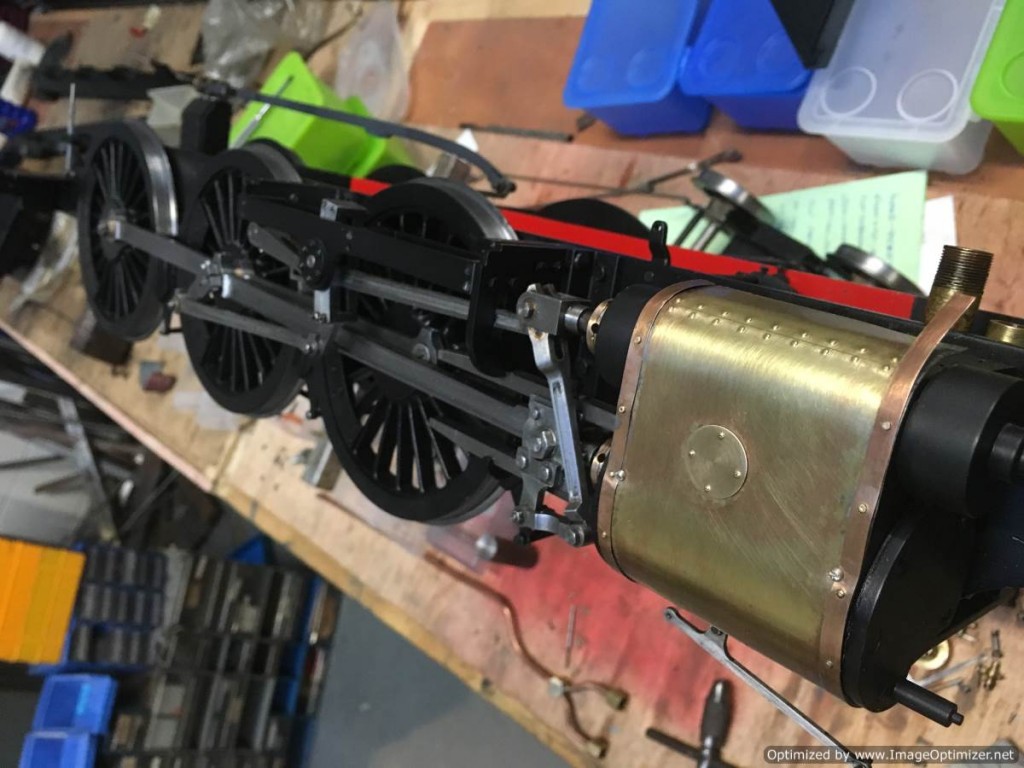
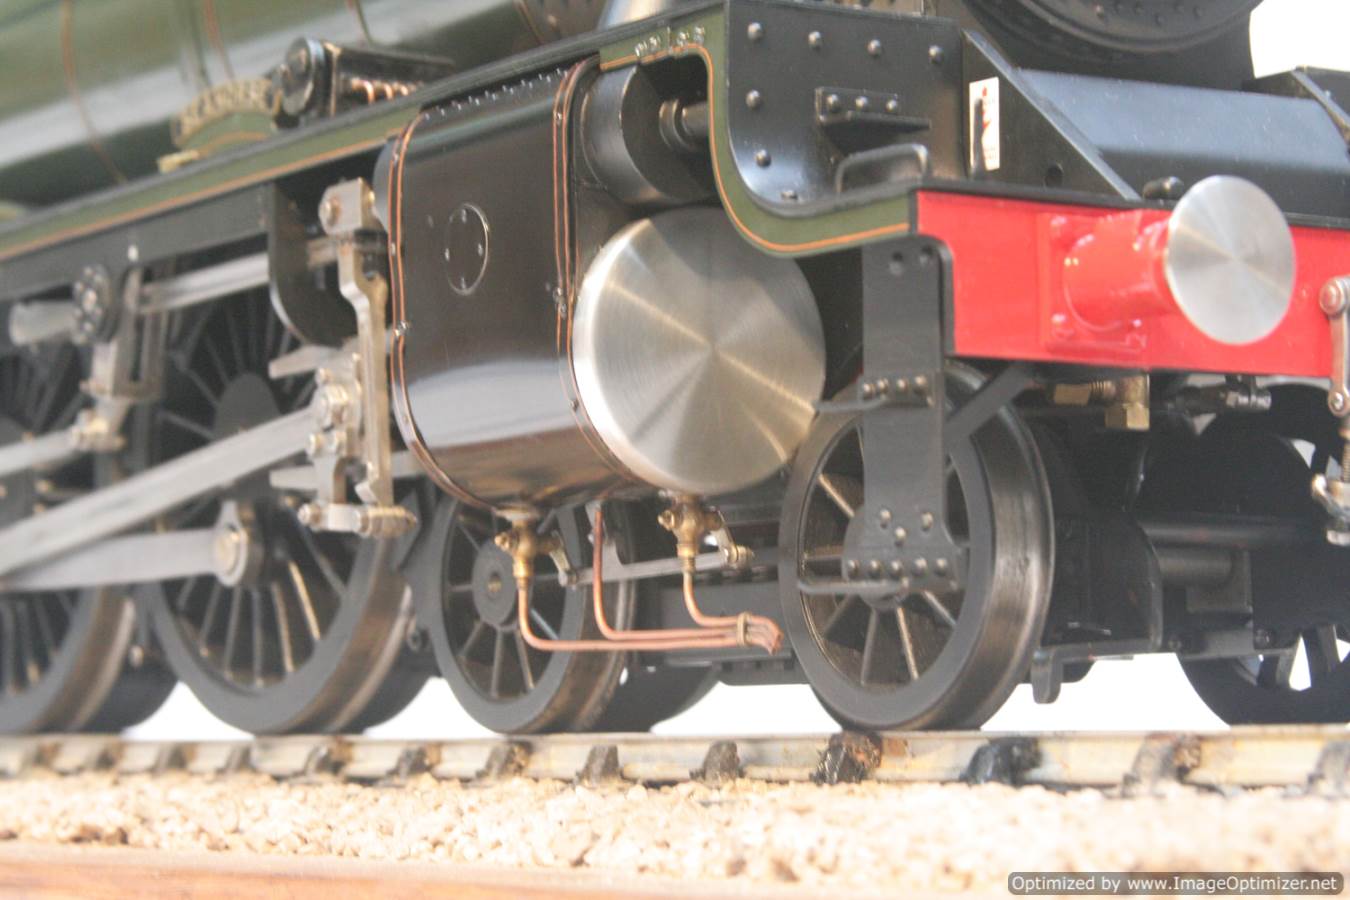
To the frames then! Full strip down, bead blast to bare metal followed by etch prime, mask and top coats. The red in between the frames on a full size job stops in a vertical line before the cylinders and behind the rear axle, so that's what we have done. The refurbished twin axle pump was re-fitted to the frames too as it acts as a frame stretcher and is part of the models structural strength.
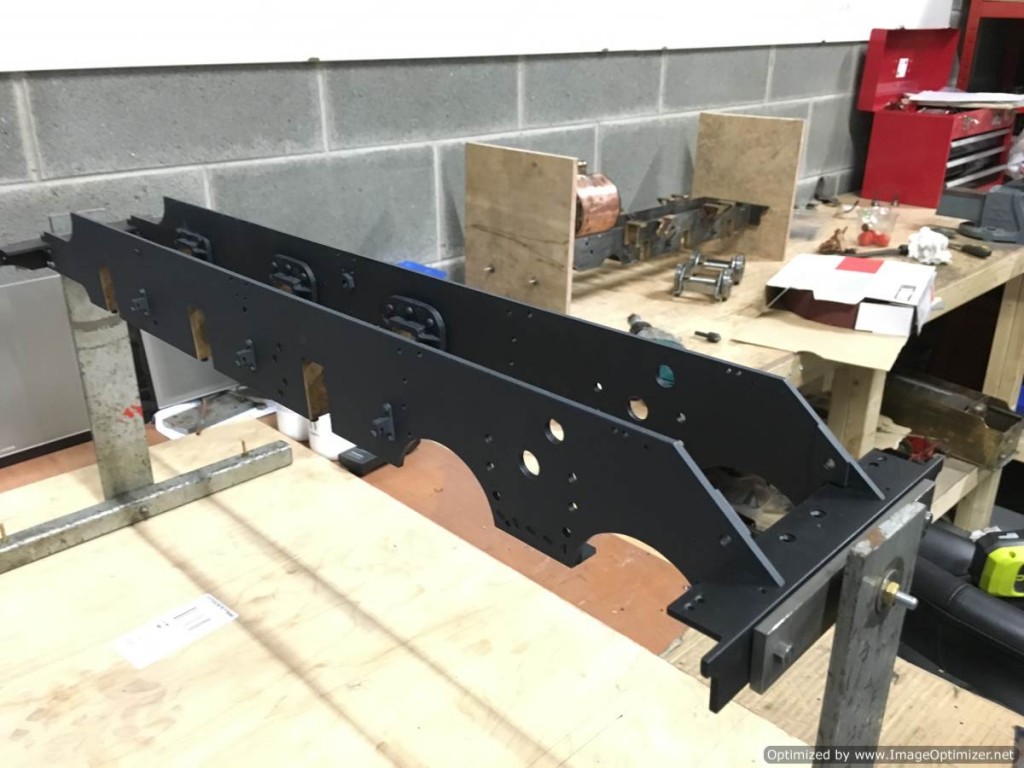
The horn guides were all skimmed up on the Bridgeport to make sure everything was nice and square for the new boxes.
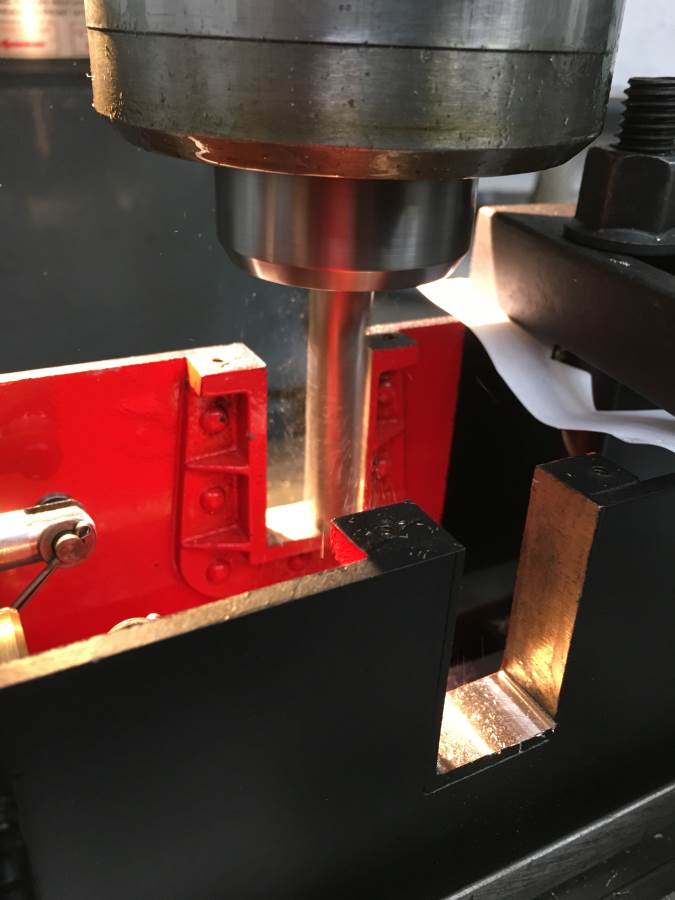
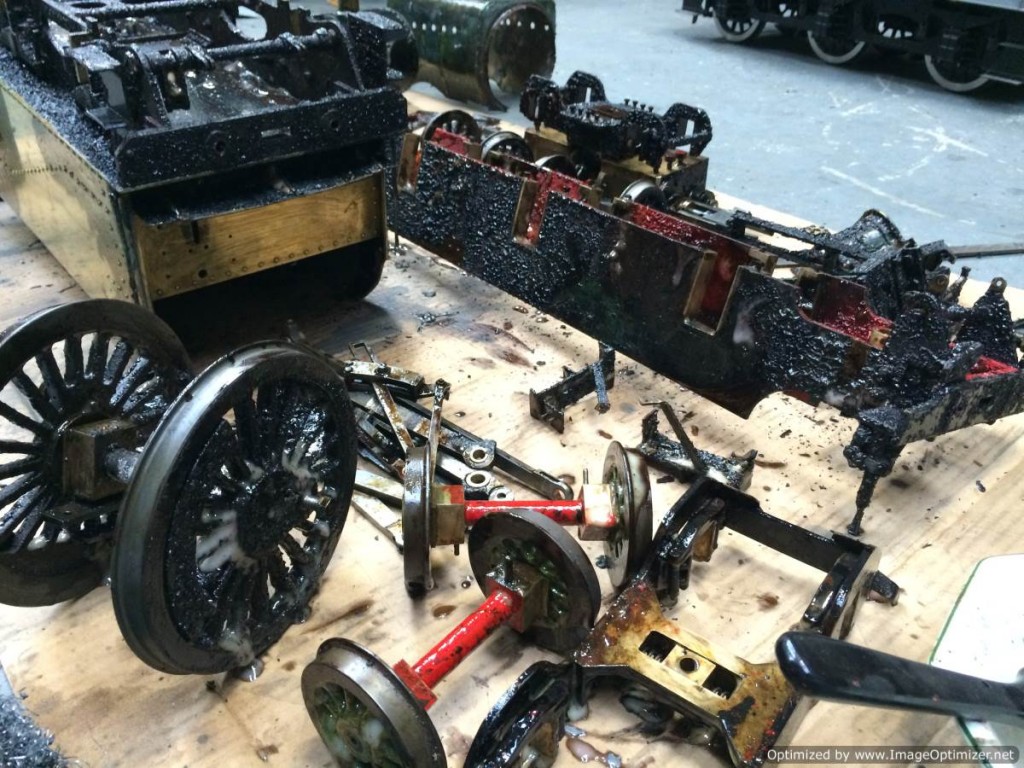
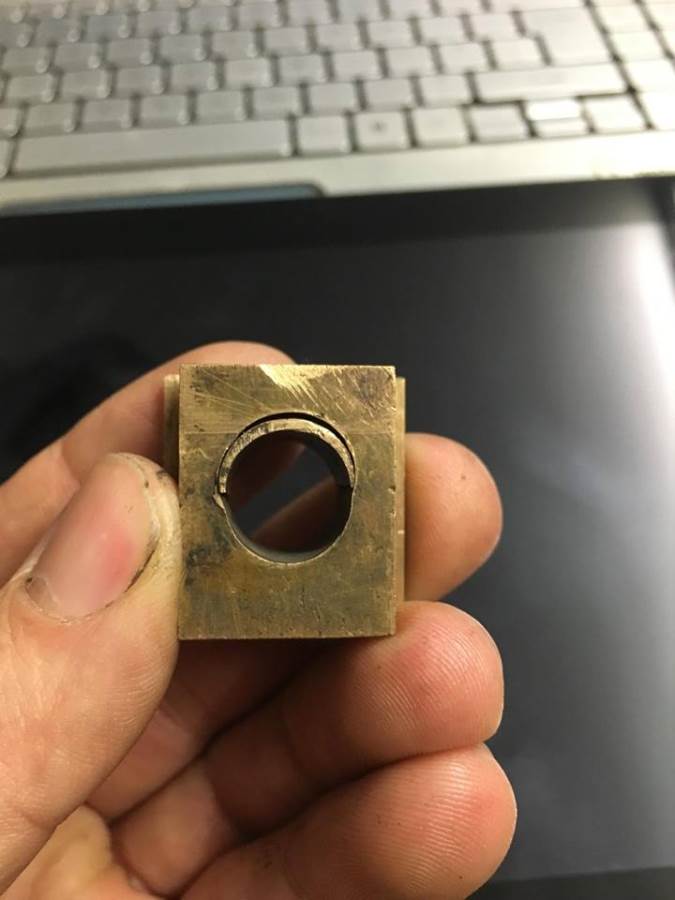
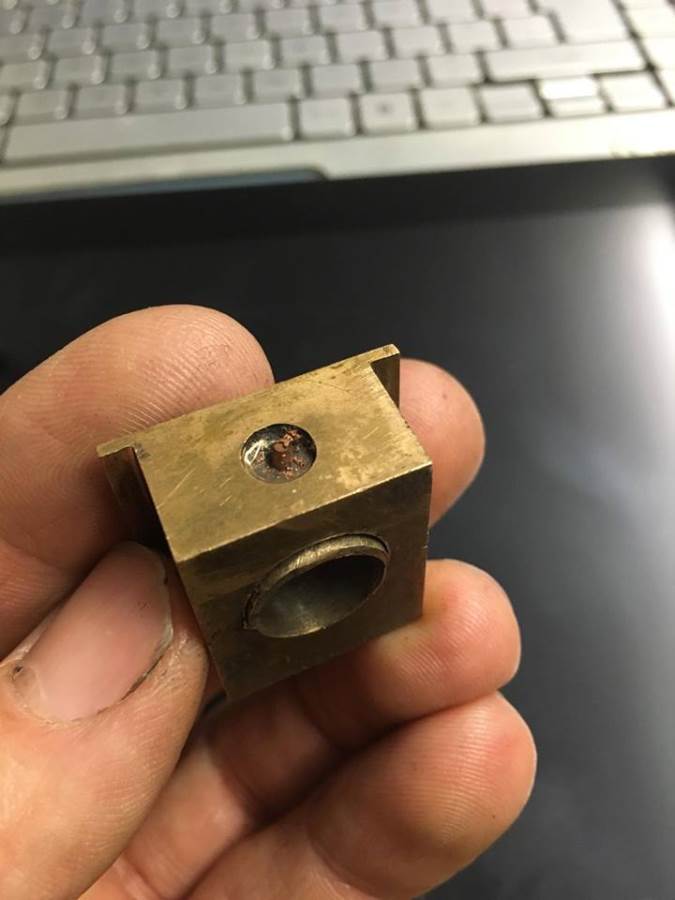
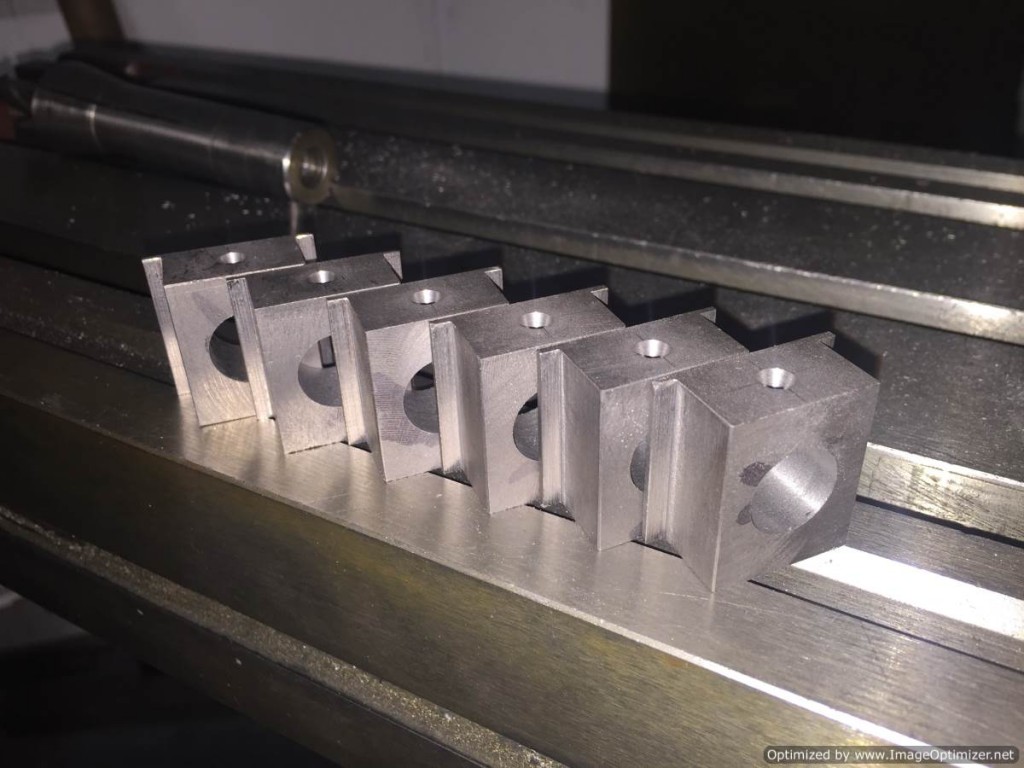
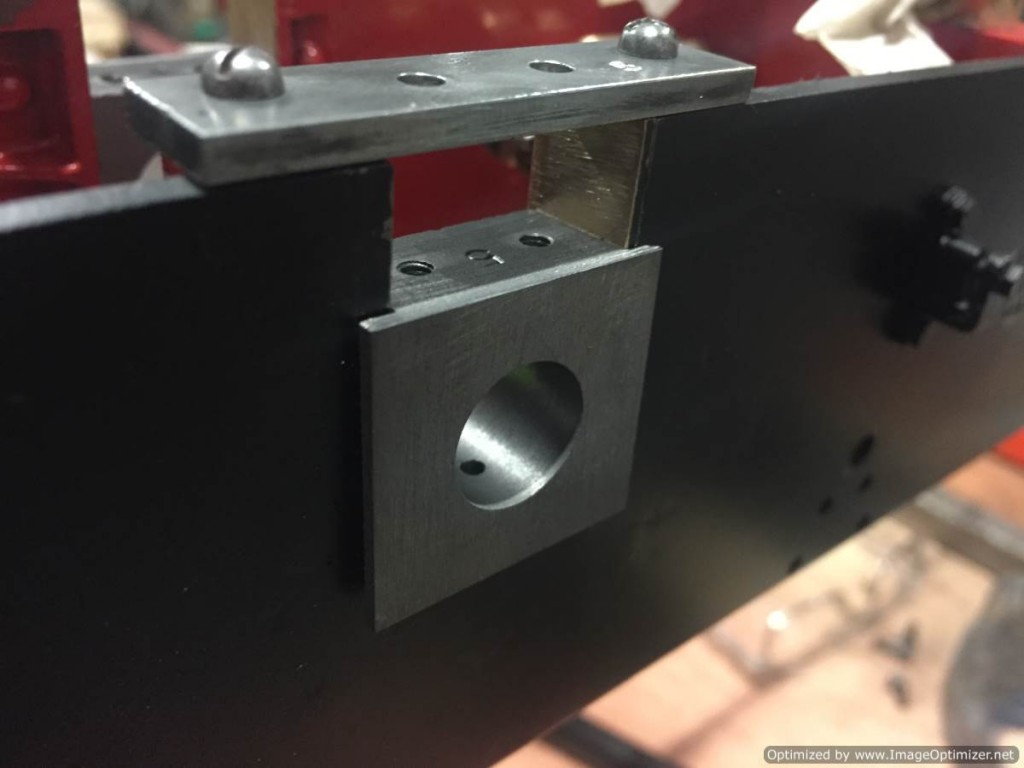
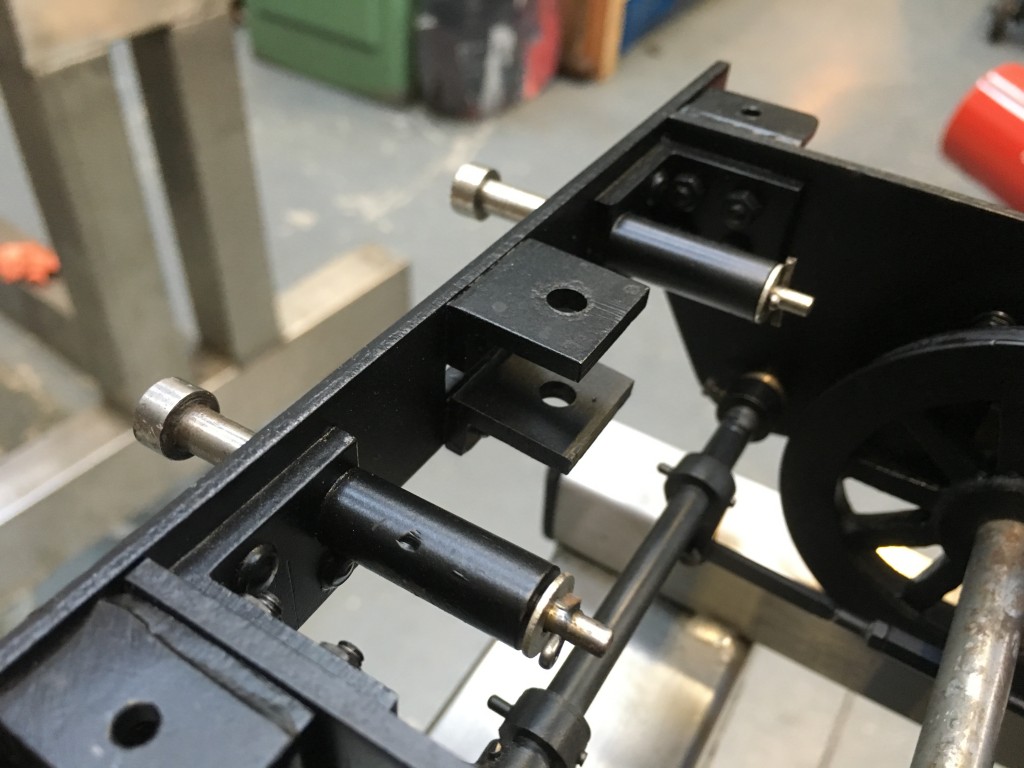
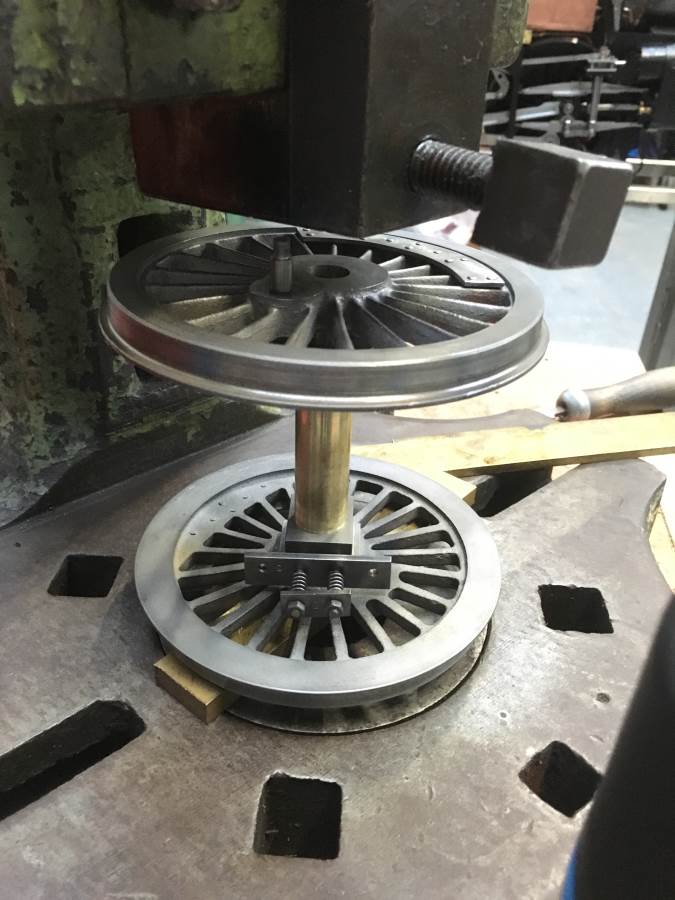
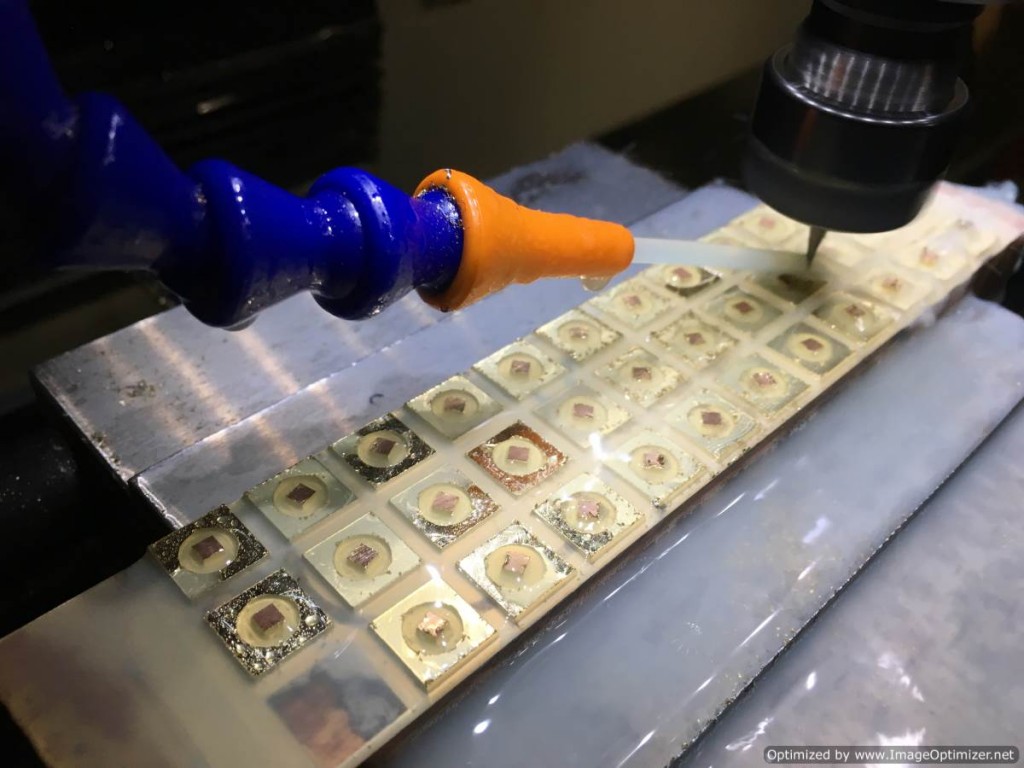
Then, upon inspection,..... we noticed some horrible crimes committed on the axle boxes! The rear axle had simply been running in the ash pan. The axle boxes also, for the rear axle being entirely exposed to the ash. Consequently they had been grinding themselves away for some time, and were now more oval than a rugby ball in a Cricket stadium! Then, on top of that, at some point someone has attempted a solution by popping in a crescent moon shim,.... which they held in place by shoving a bit of copper wire in through the oil hole!! The upshot was that we decided to make both new Axle boxes and new axles,.... the rear of which is now going to run in a sealed cannon box to stop any future ash ingress into the box. The new ones are cast iron, machined from solid cast bar.

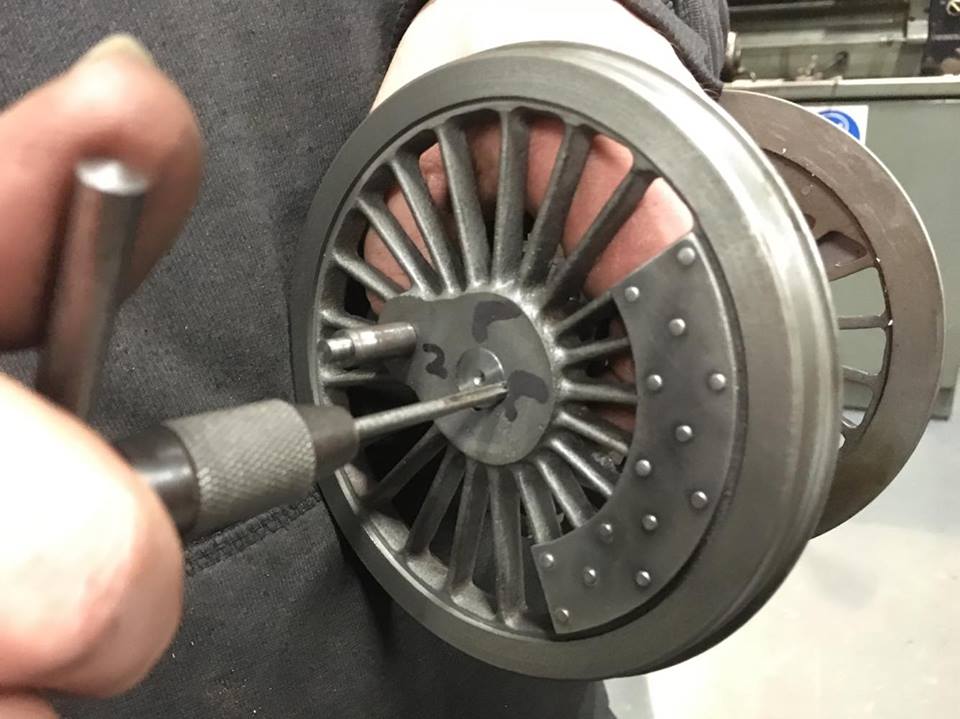
At this point we spotted we had a little problem with one of the bogie wheels. The cast iron flange had been chipped at some point, and repaired in fine Heath Robinson fashion! A couple of holes drilled, some nails crammed in and then the whole thing filled with car body filler. To be fair,.... it had obviously worked! We obviously stripped it all off, cleaned up the face of the chip and cast iron welded a lump into the hole, which was then machined back to the correct profile.
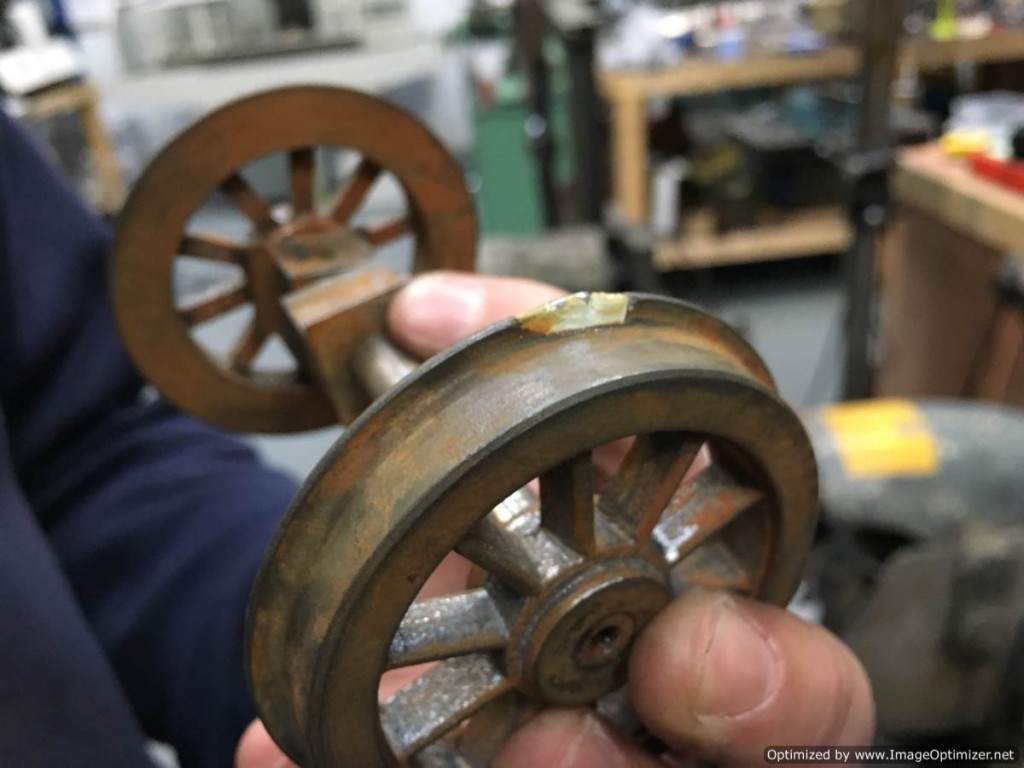
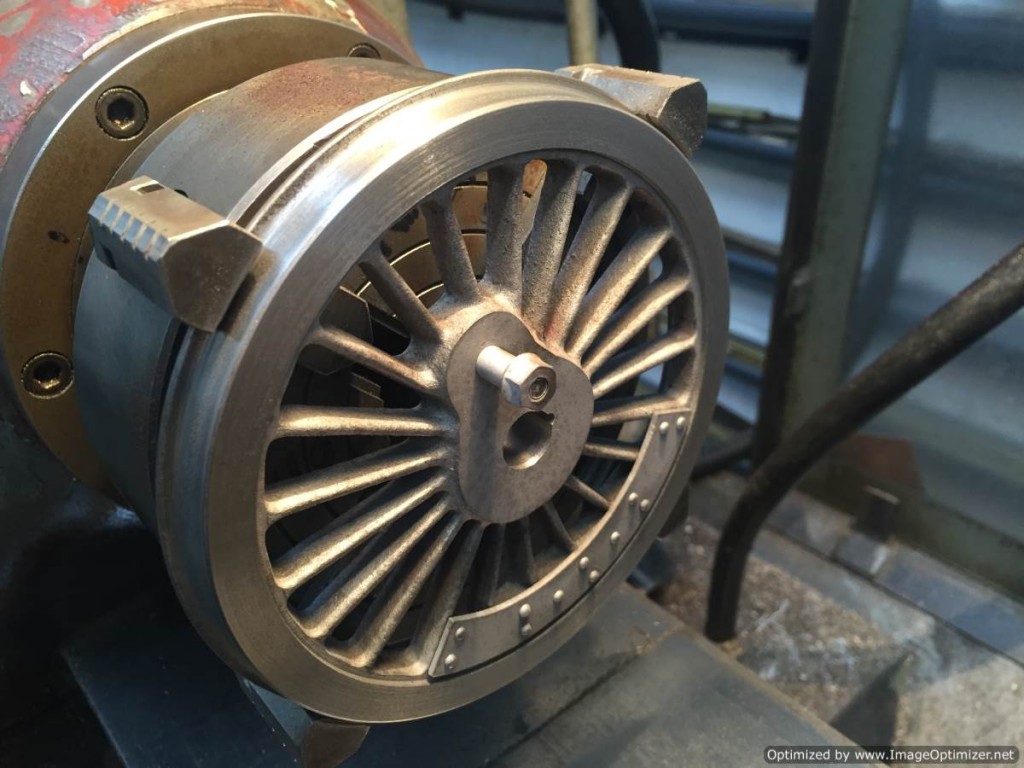
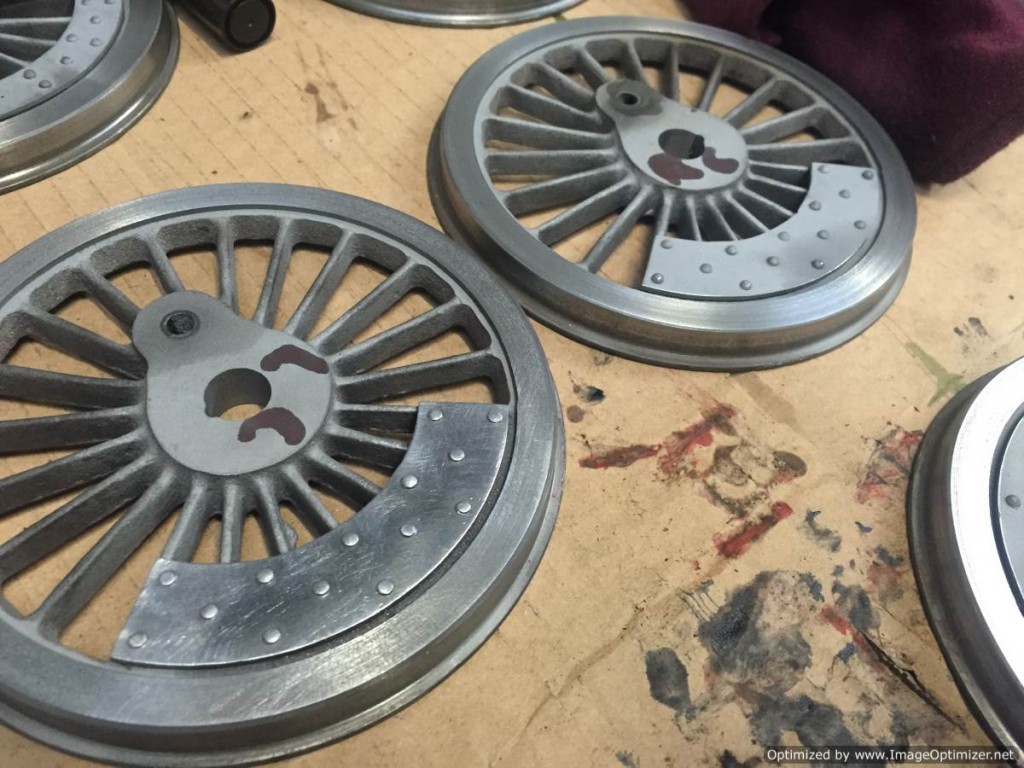
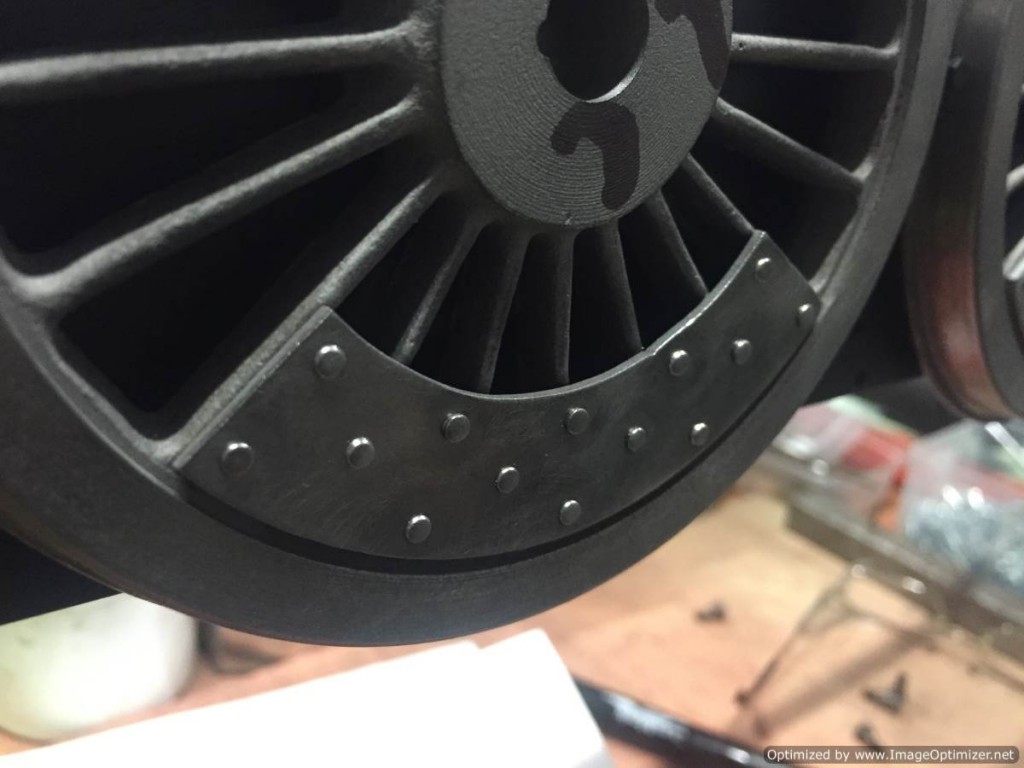
This takes us nicely into the wheels. Firstly due to the axle box issue, we decided fairly early on to make new axles to go into the new boxes. This meant re-boring the wheels as well to make sure everything was a nice true fit. At the same time we flattened off the dome headed rivet detail holding on the balance weights as on the full size thing these are flat head rivets rather than 'sticky-outy' domes. Much nicer, particularly when the paint goes onto them and the light starts reflecting off the surfaces.
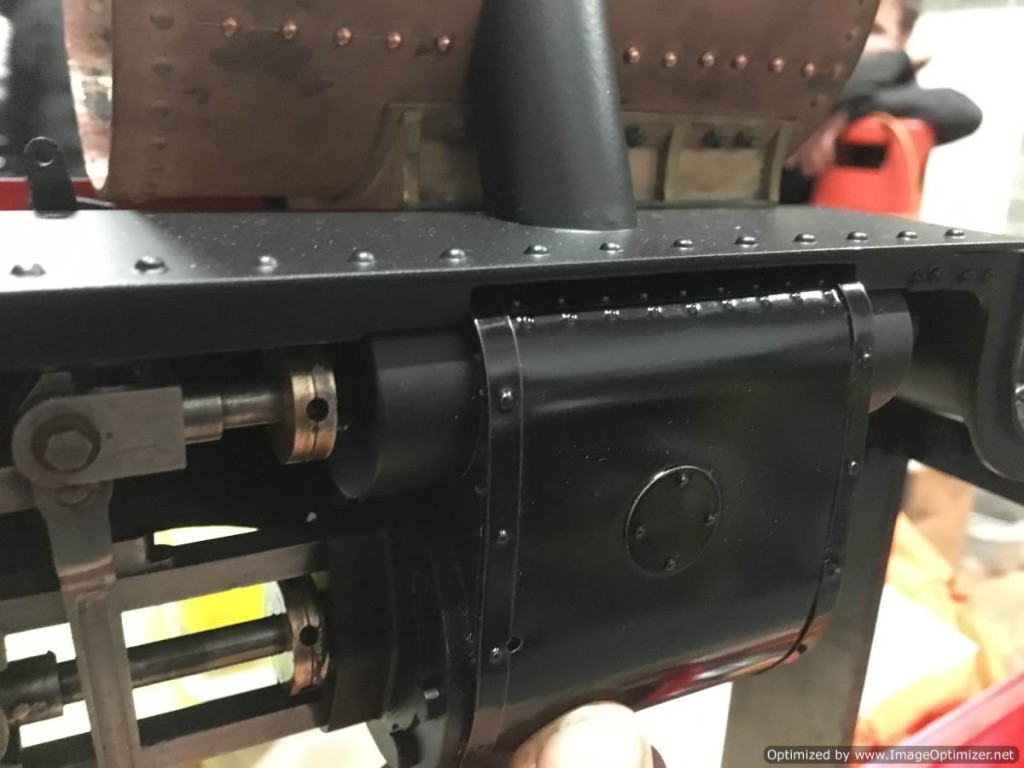
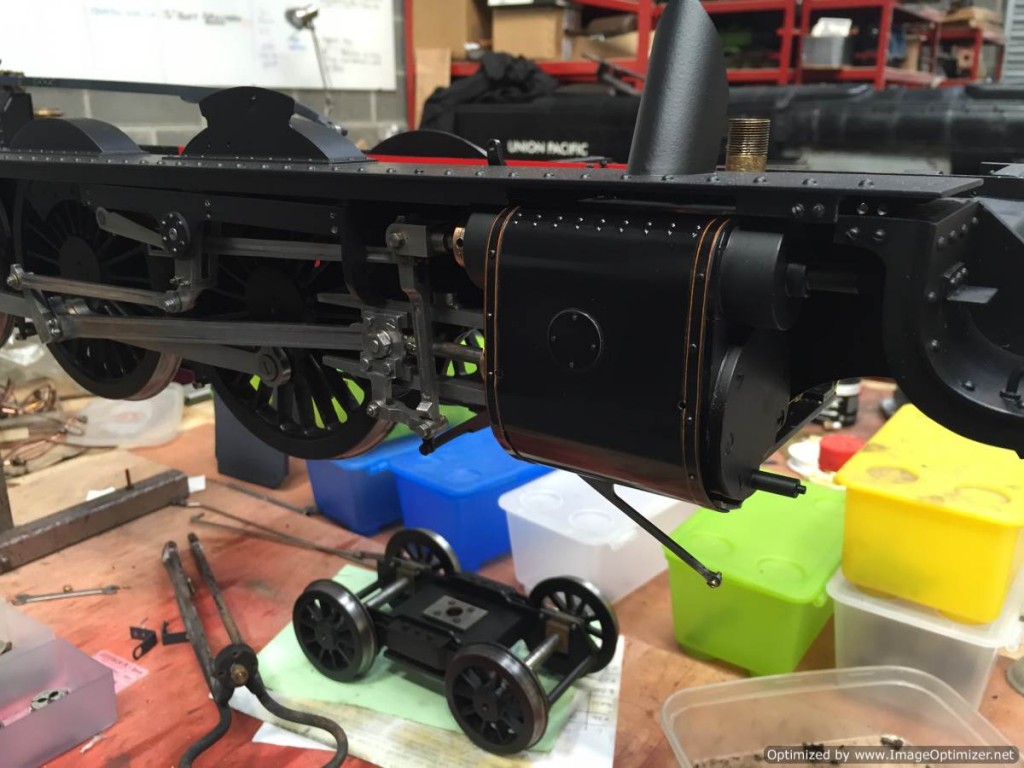
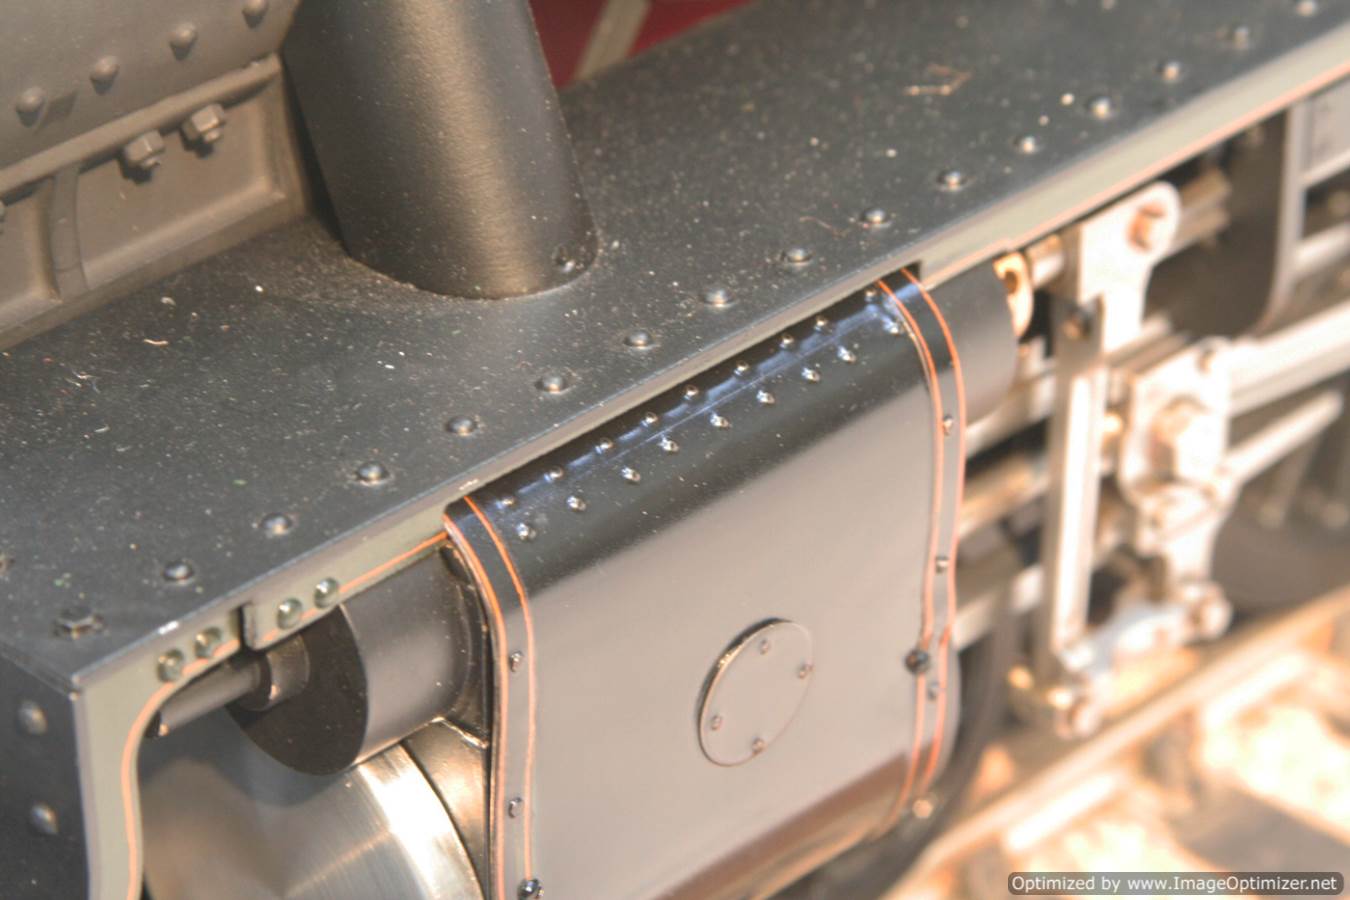
The cylinders! They needed a bit of work. The port faces were skimmed up and re-faced to make sure that all the steam seals were tight and that the loco should have a nice crisp bark. But if you look at the original photos, the loco, being slide valve has the usual square topped valve chest on top of the cylinders, which cuts quite intrusively into the running board valance,.... and frankly looks horrible. So,.... the decision was taken to reduce the height of the valve chest in the milling machine. This obviously meant that the valve it's self would also need skimming down to fit inside the now shallower valve chest. We were limited by the position of the valve spindle it's self, and also the consideration of ensuring that the valve chest was still big enough in volume to allow the steam to flow fast enough to make the loco perform. But all that in mind, we finished off the top valve chest cover with a radius to enable the new cylinder cladding to now curve under the valance, more or less as it should on the full size. A little bit of a compromise on this, as there just wasn't enough 'meat' in the block to get as gentle a shape as we would have liked, but a considerable improvement over the square topped jobbies!

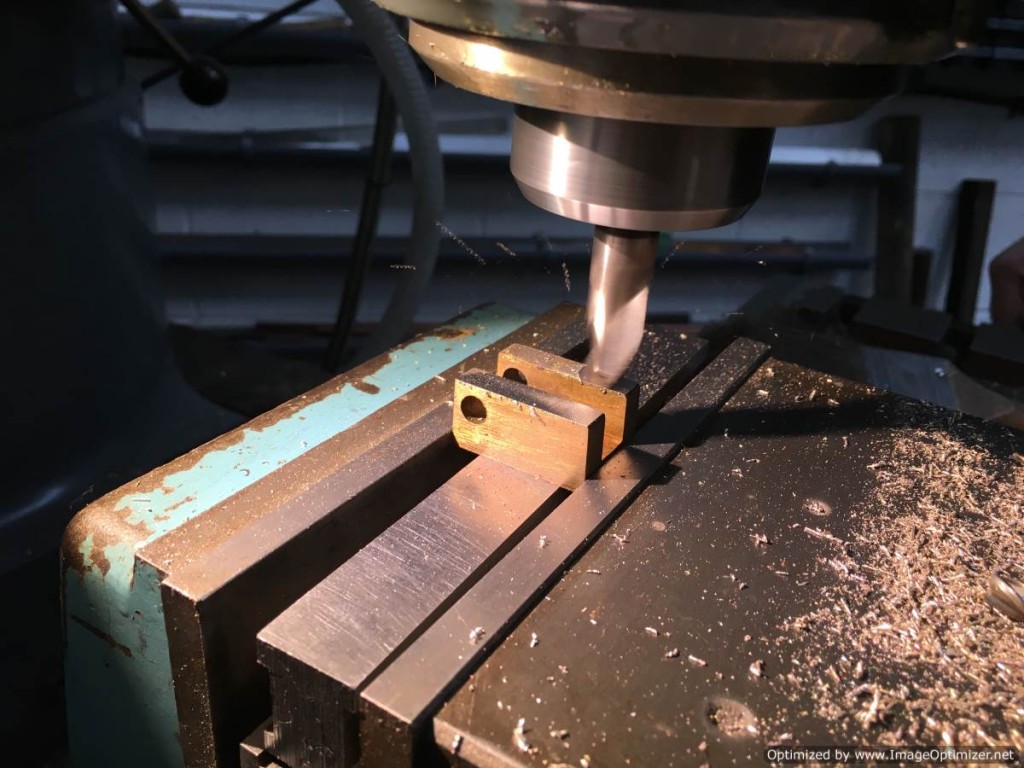
Next up! The axles. The rear axle had been running in the ashpan, so as you saw, the boxes and axle were absolutely trashed! So we've made brand new silver steel axles, and the rear one is now running in a new cannon sleeve to inhibit any ash ingress.
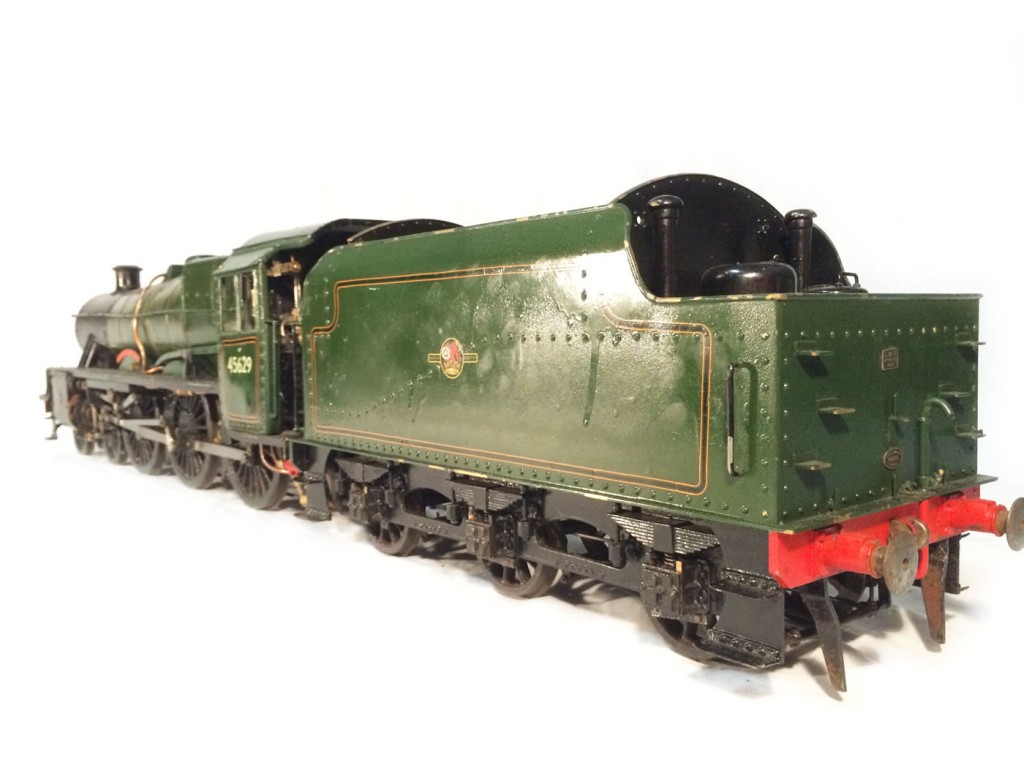
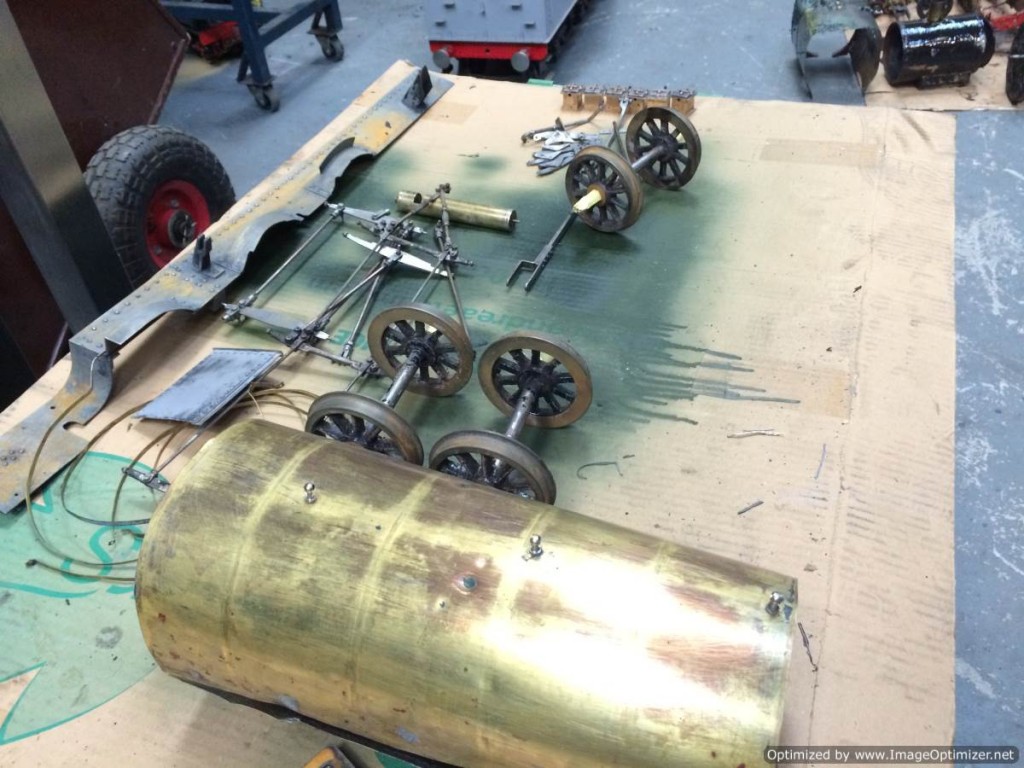
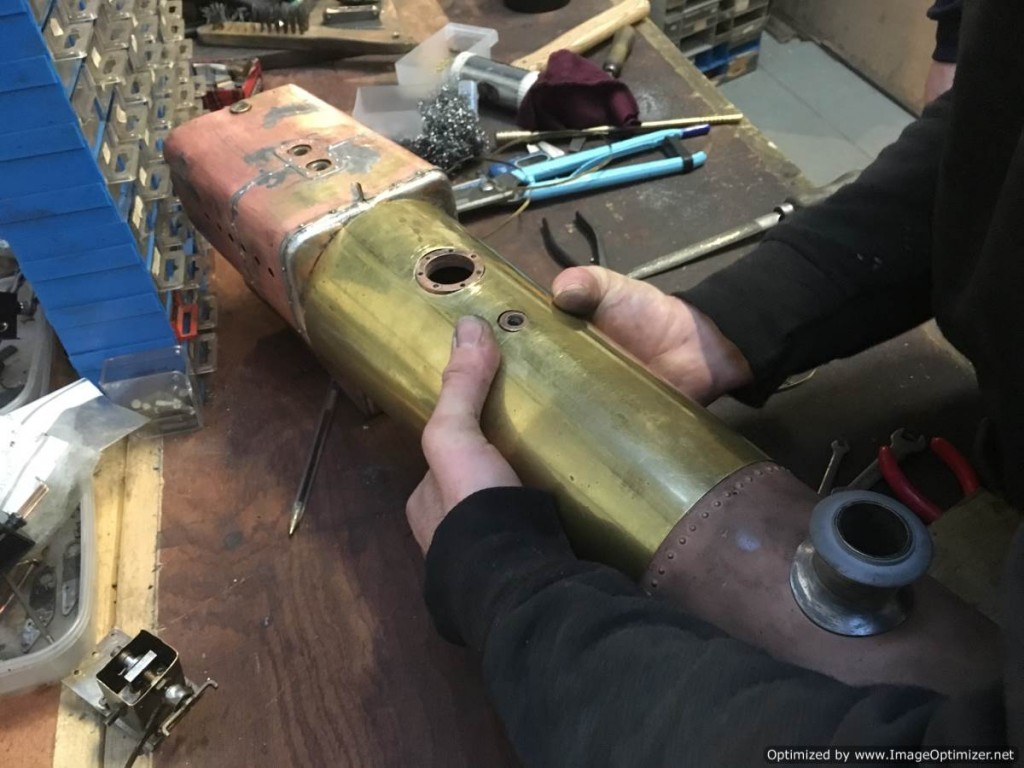
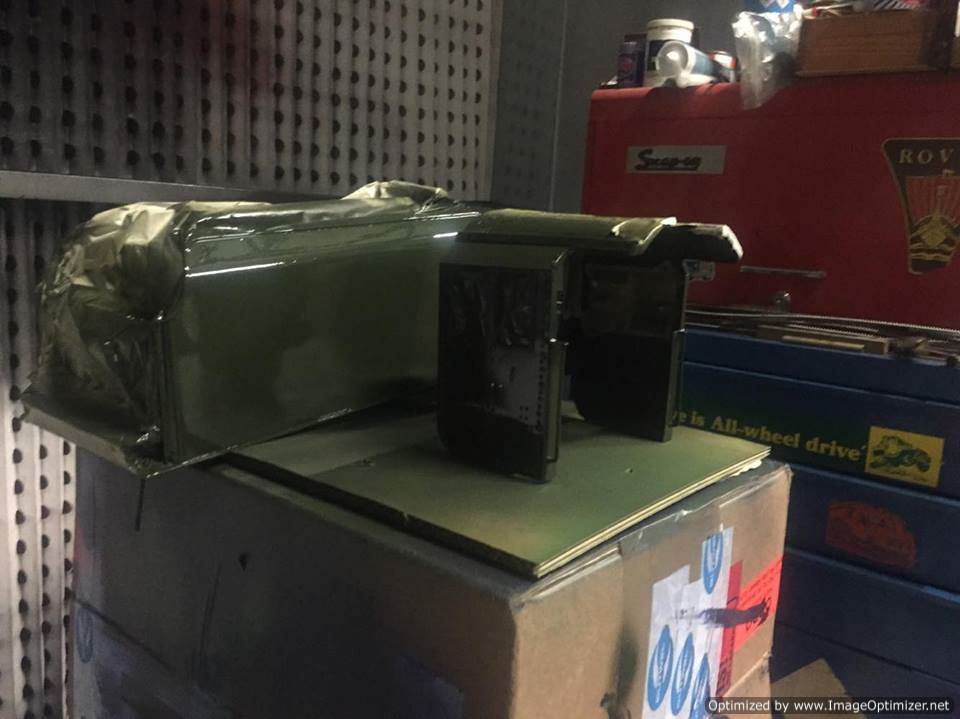
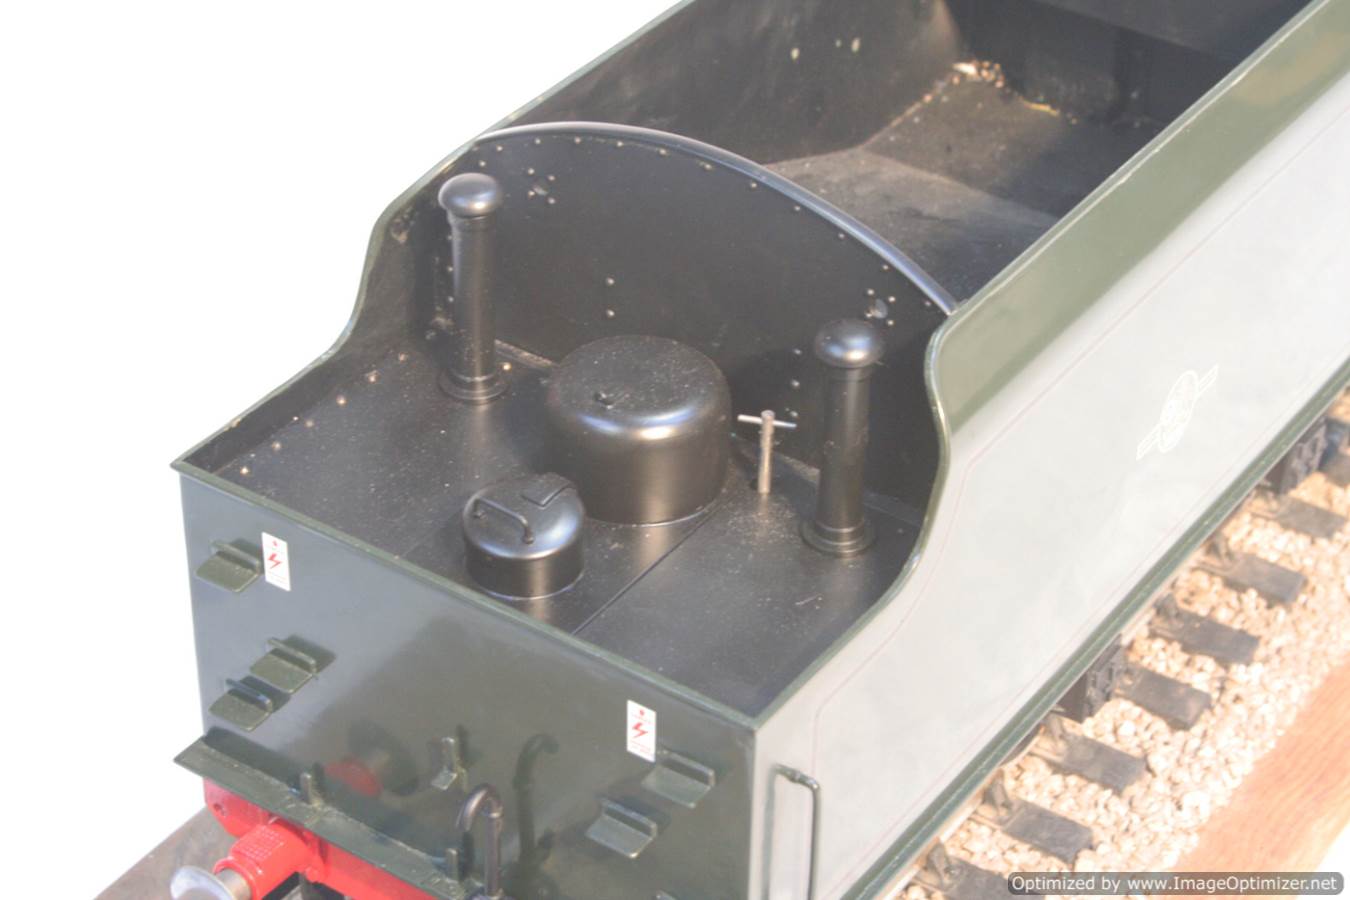
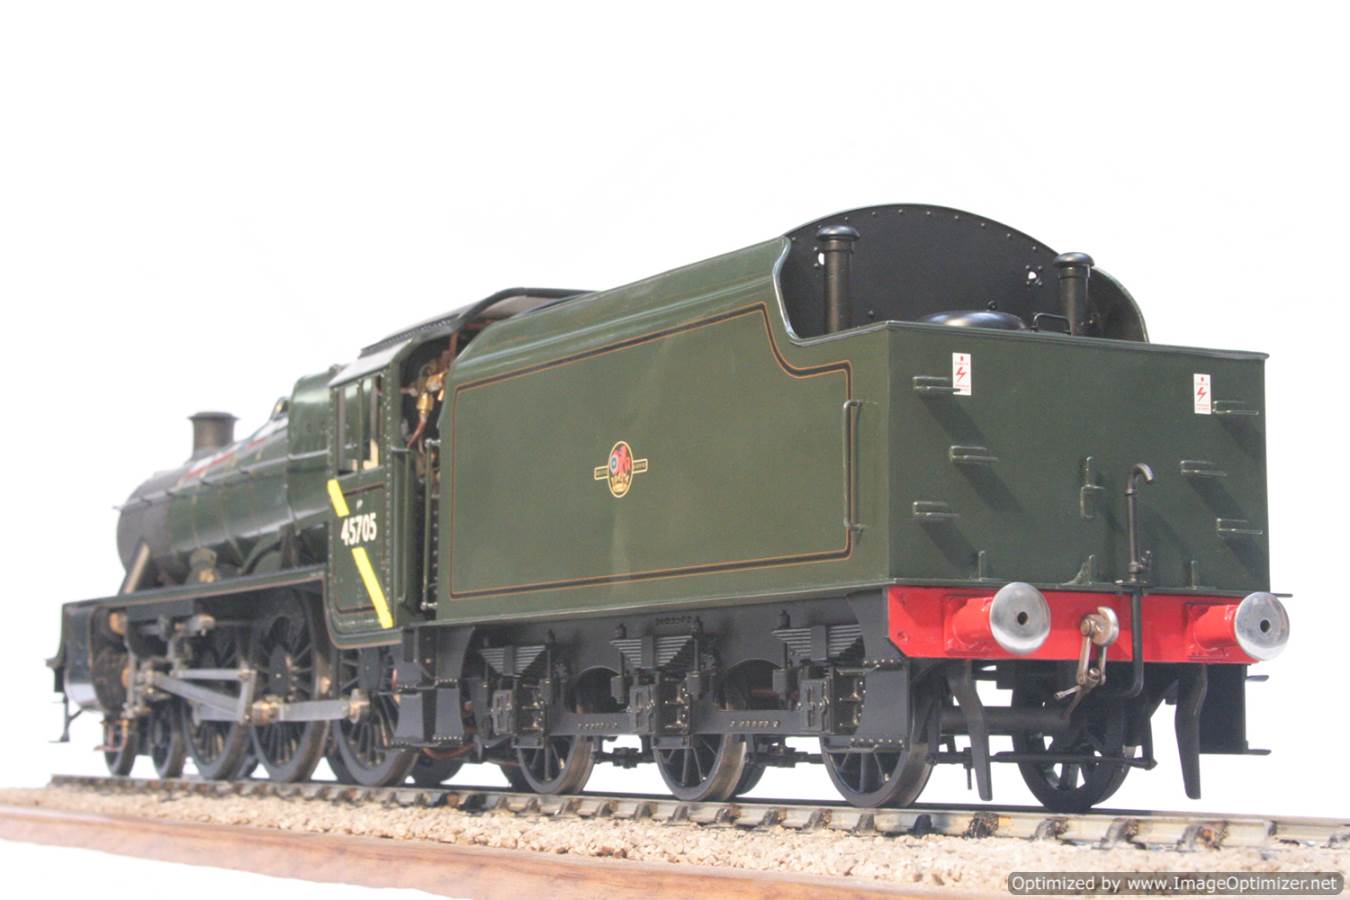
The tender frames were completely disassembled, stripped right back to the bare frames, bead blasted, etch primed and then re-painted. We will spare you the individual photos, but this it the tender chassis in it's re-built state, ready to take the body. The detail is very nice, and certainly justifies the rebuild that we are doing on it.
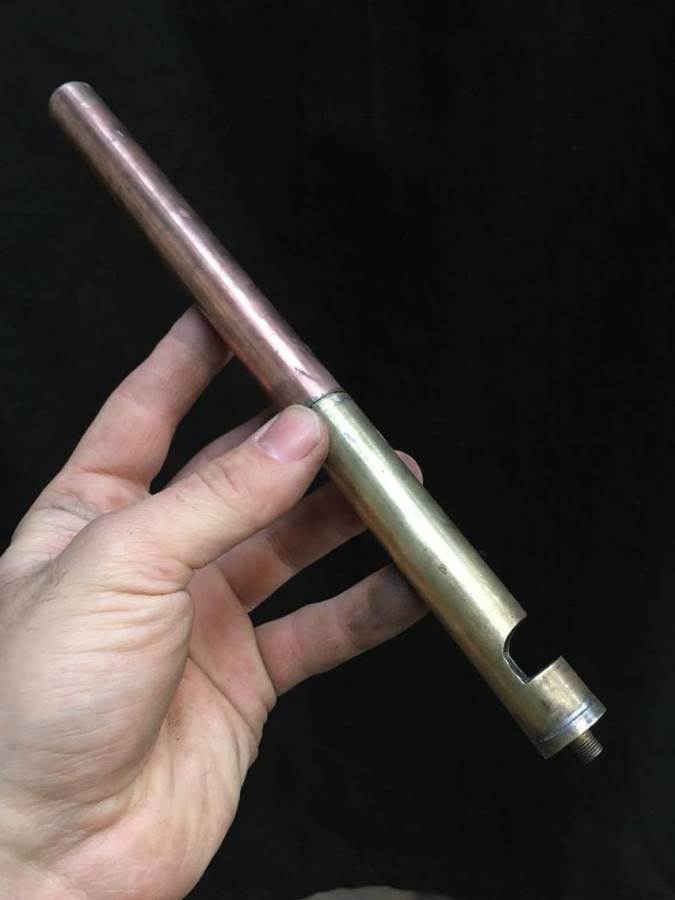
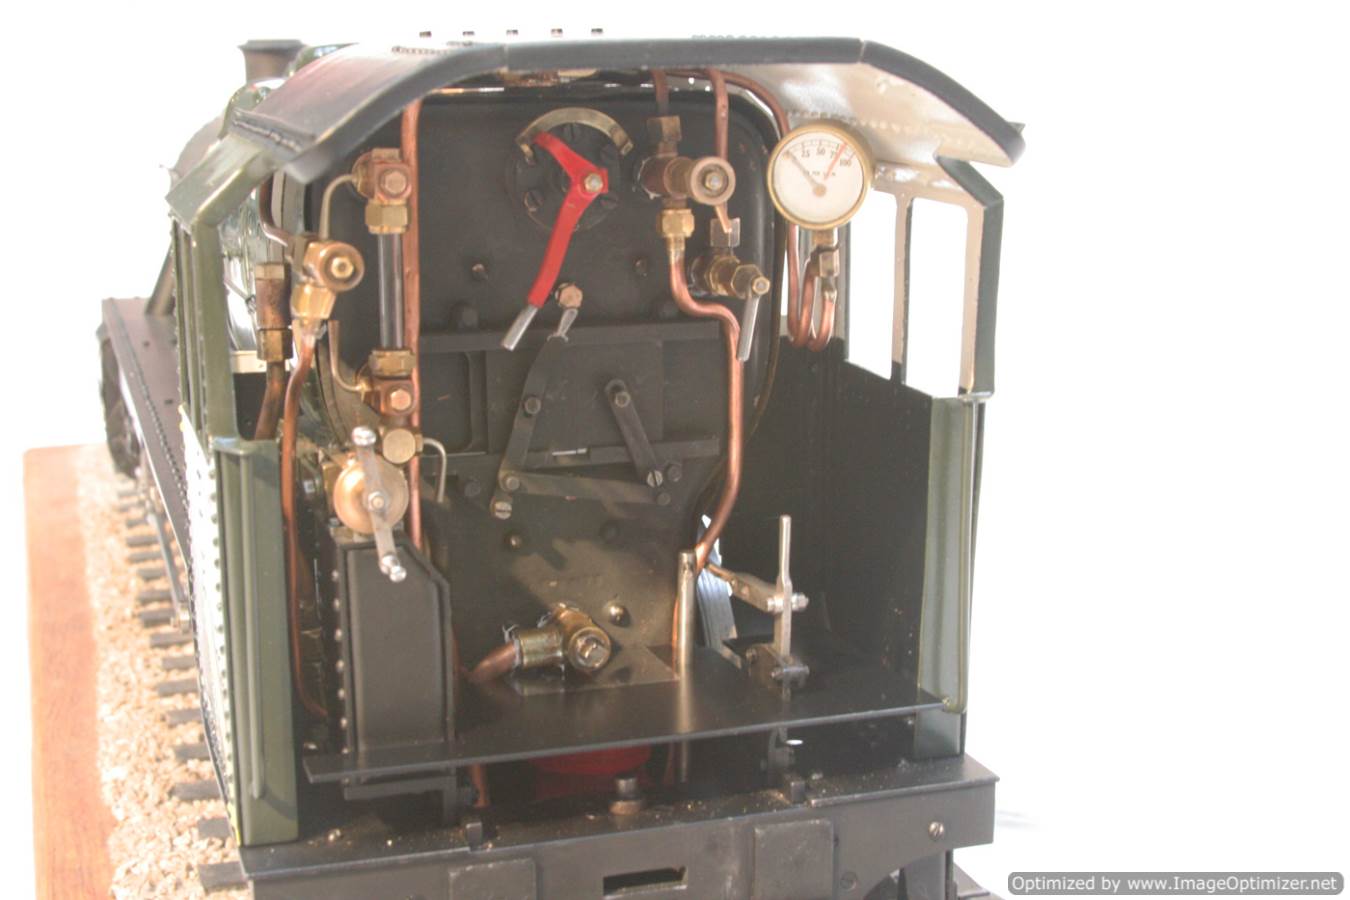
The whistle!! Well it was a nice whistle. But here at The Steam Workshop we like our models to sound right as well as look right! So, we've sussed out a location on the engine long enough to take a full size Stanier loco whistle length (9 3/4",..... its the length that sets the pitch of the note),..... in this case we are re-locating the whistle from underneath the right hand running board to in between the frames the full length from the axle pump forwards. So hopefully she will sound like the real thing too! We've hopefully managed to get enough steam supply to the whistle too to make sure that it will 'overblow' too,.... making that characteristic Stanier hooter squeak at the start of the sound.
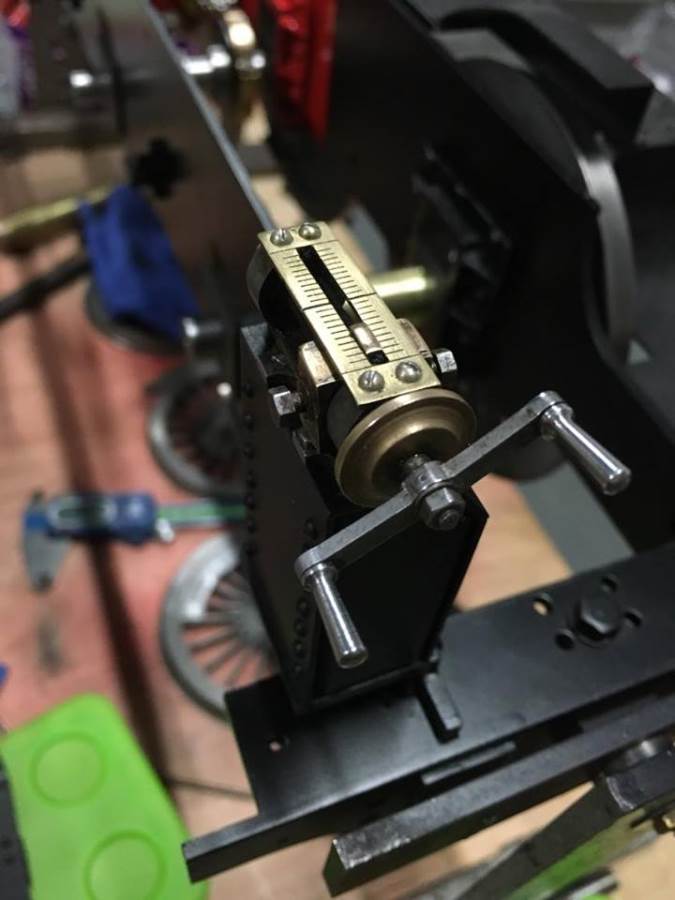
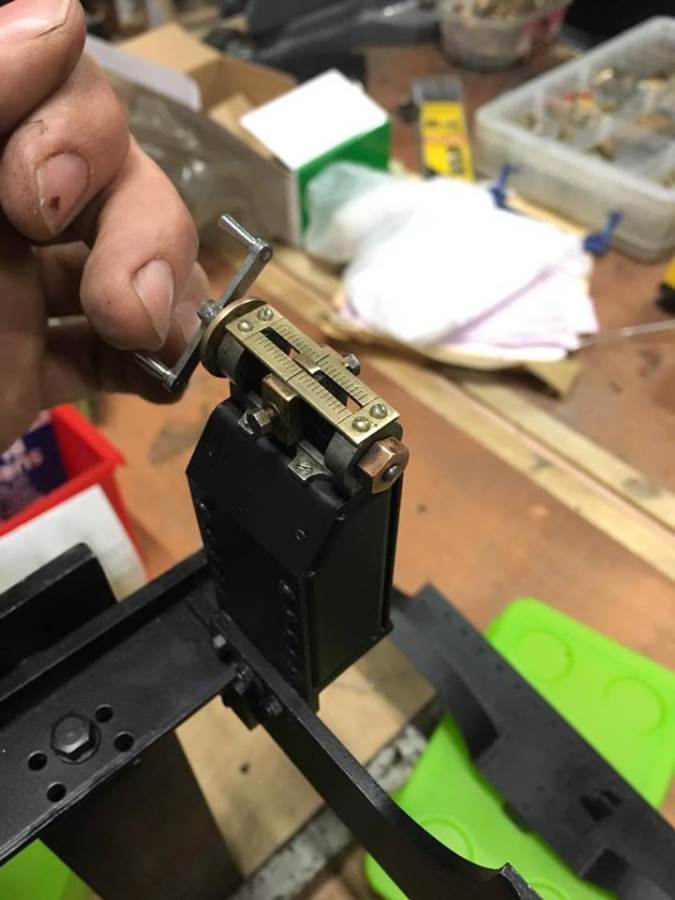
As the loco starts to come together, some of the nice detail bits can start to go on. The reverser was really nicely made, but a little plain. We've obviously rebuilt it, but also added a bit of detail to really make it look lovely on the footplate.
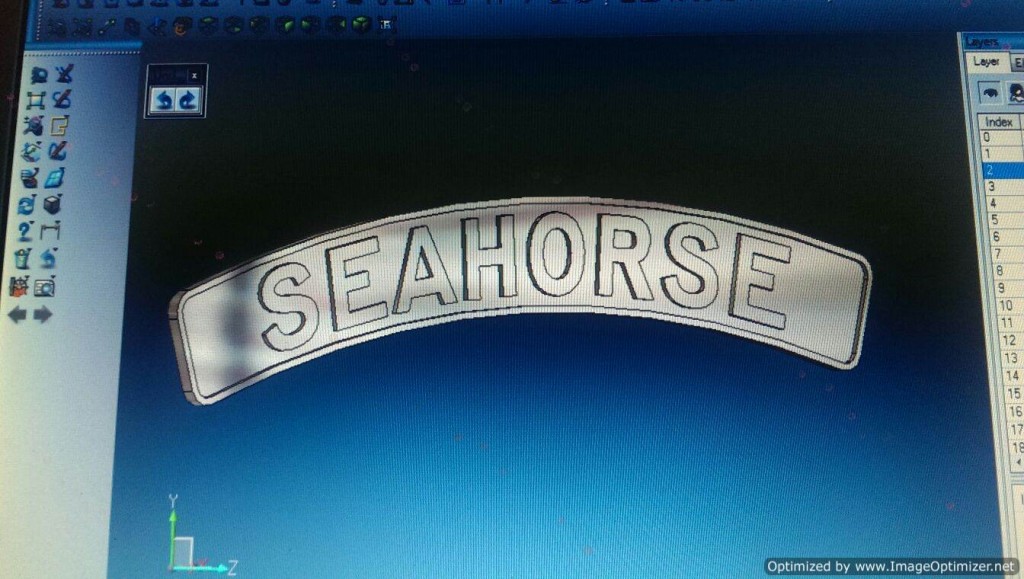
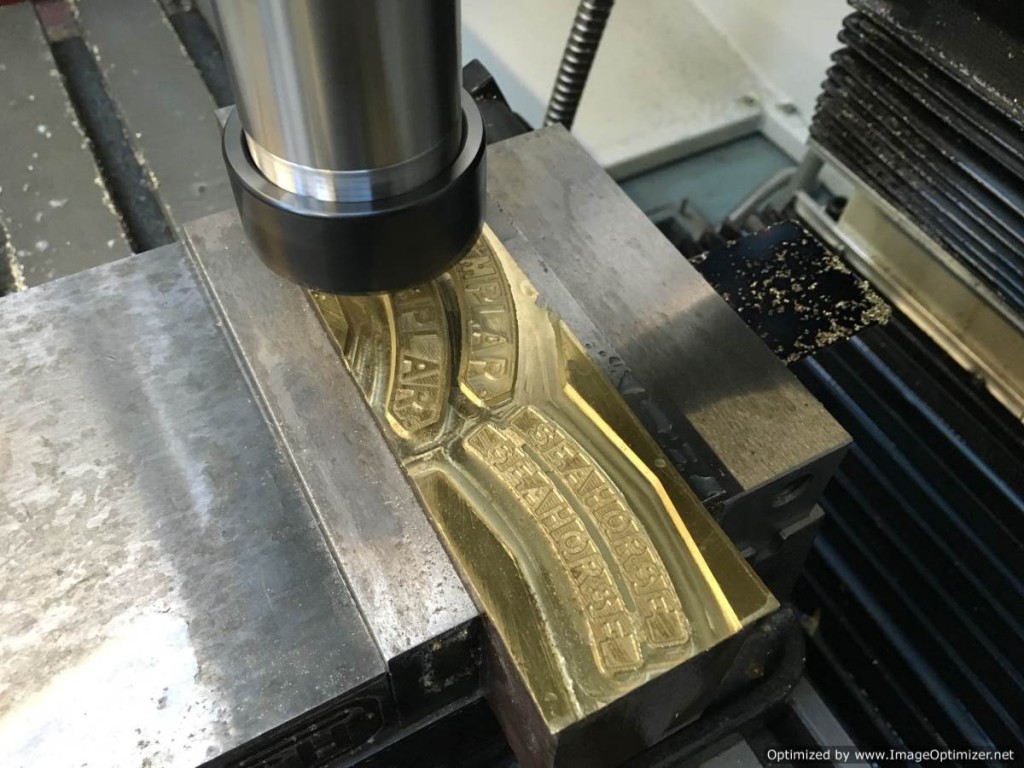
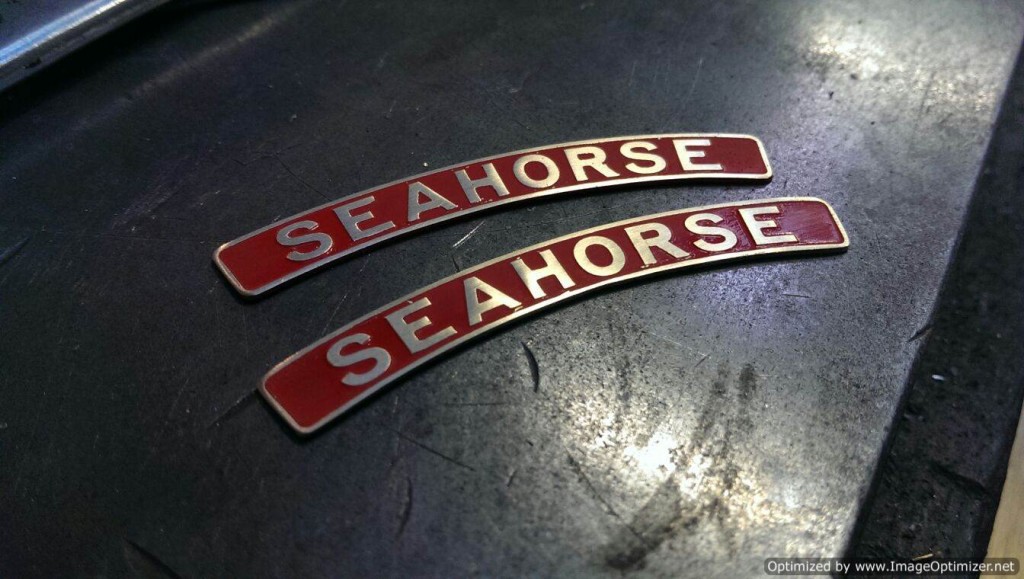
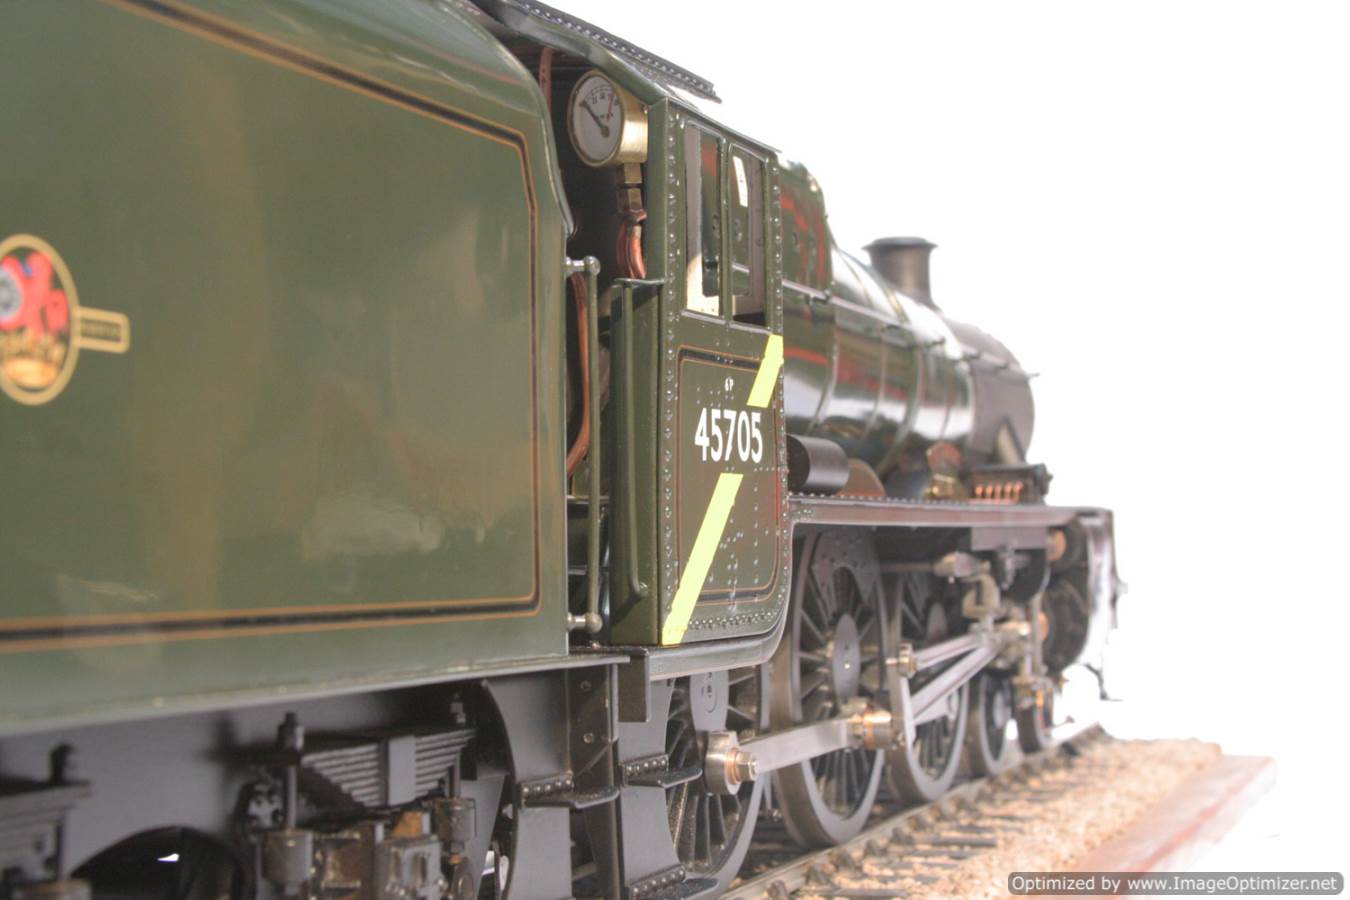
.....and the nameplates. Tricky to find a definitive photo of Seahorse in colour that proves the background plate colour, but we've pretty much decided now that they should in fact be black. So they will be getting a little 'tweak'. They do look good in red though!
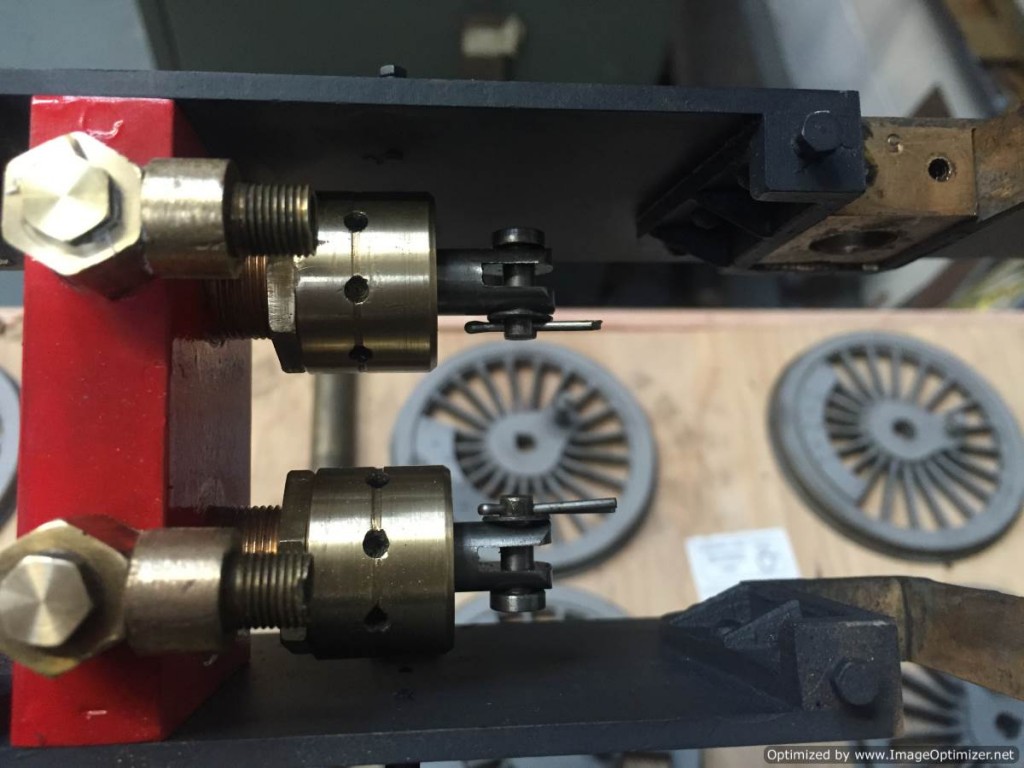
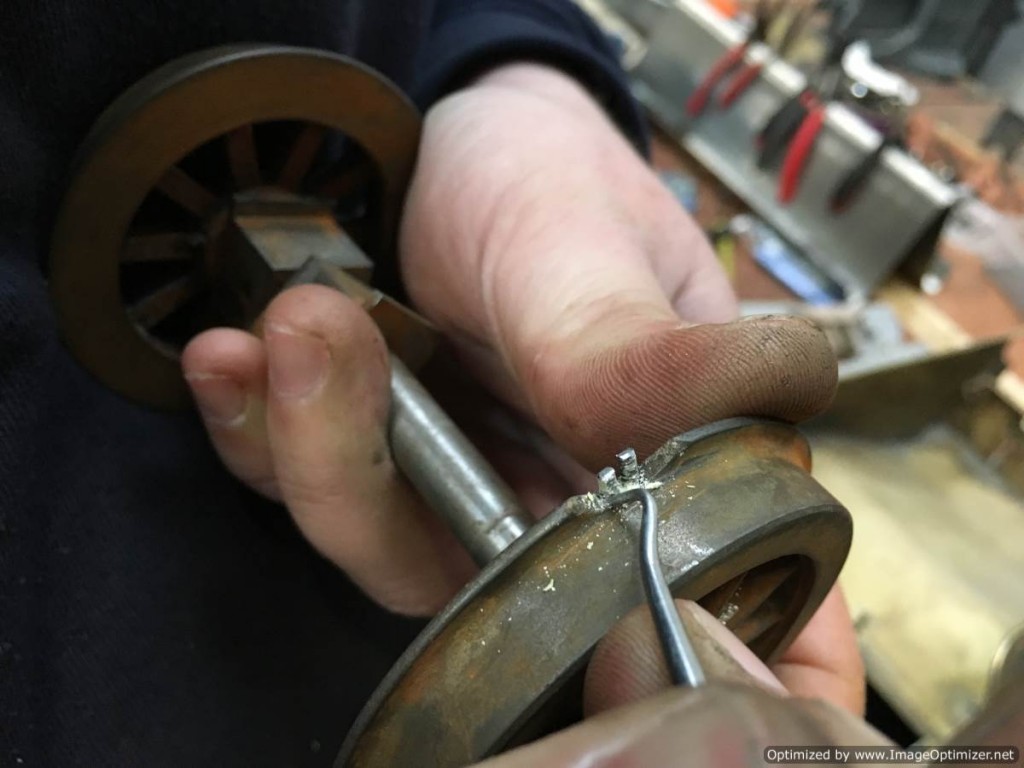
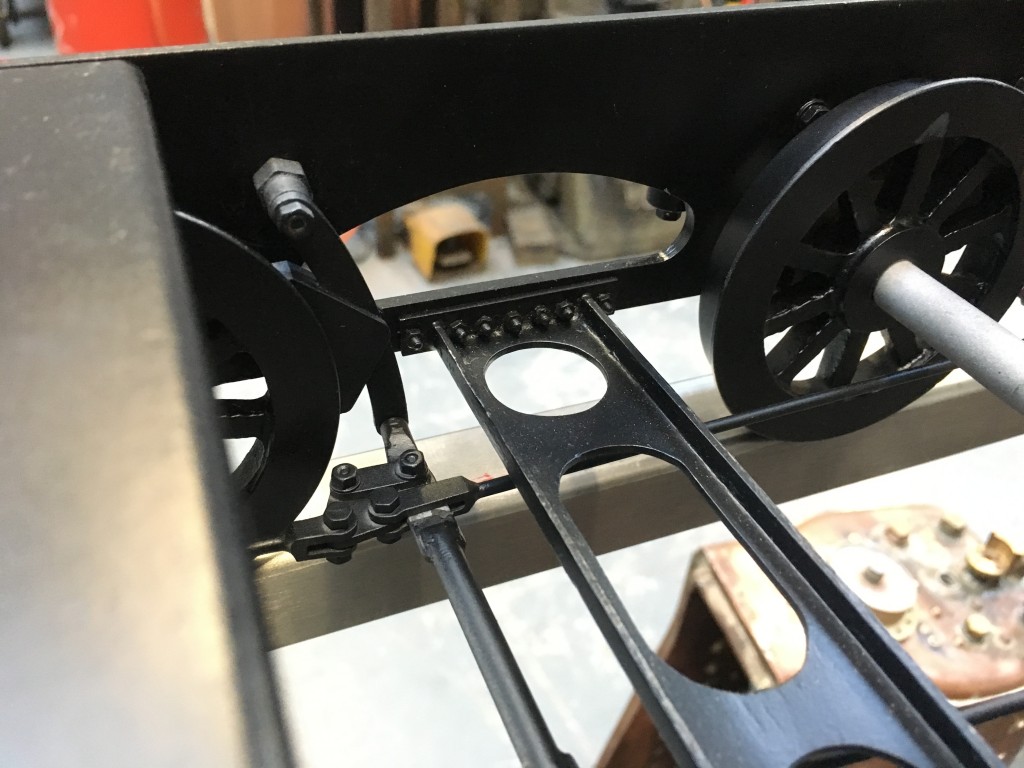
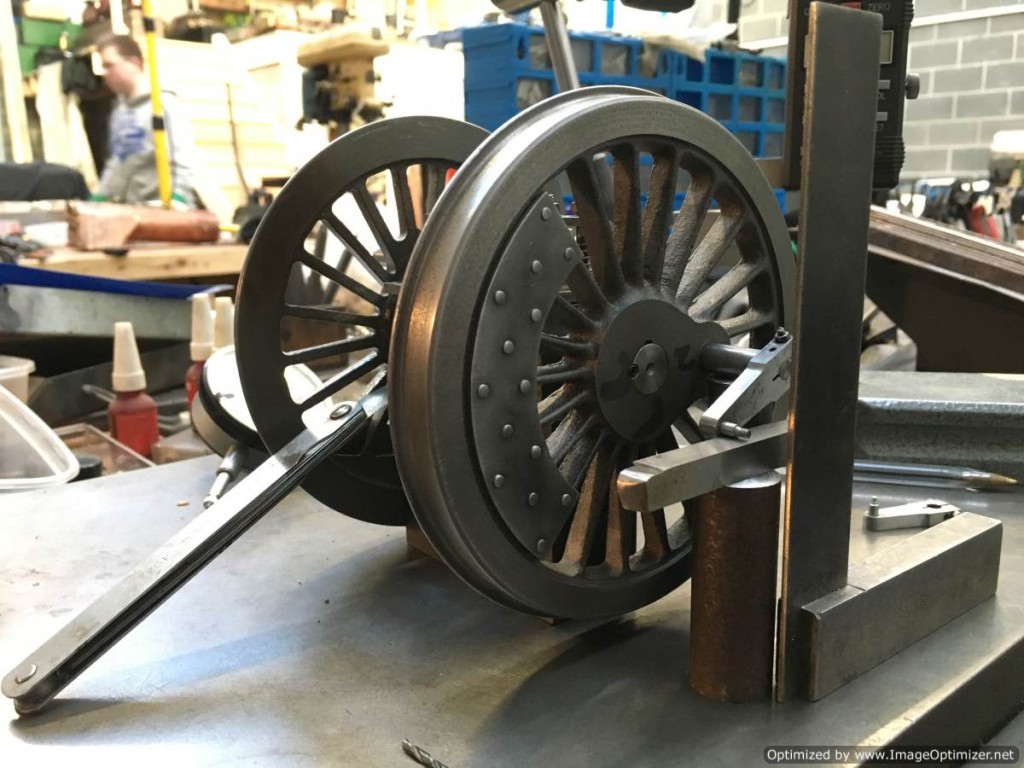
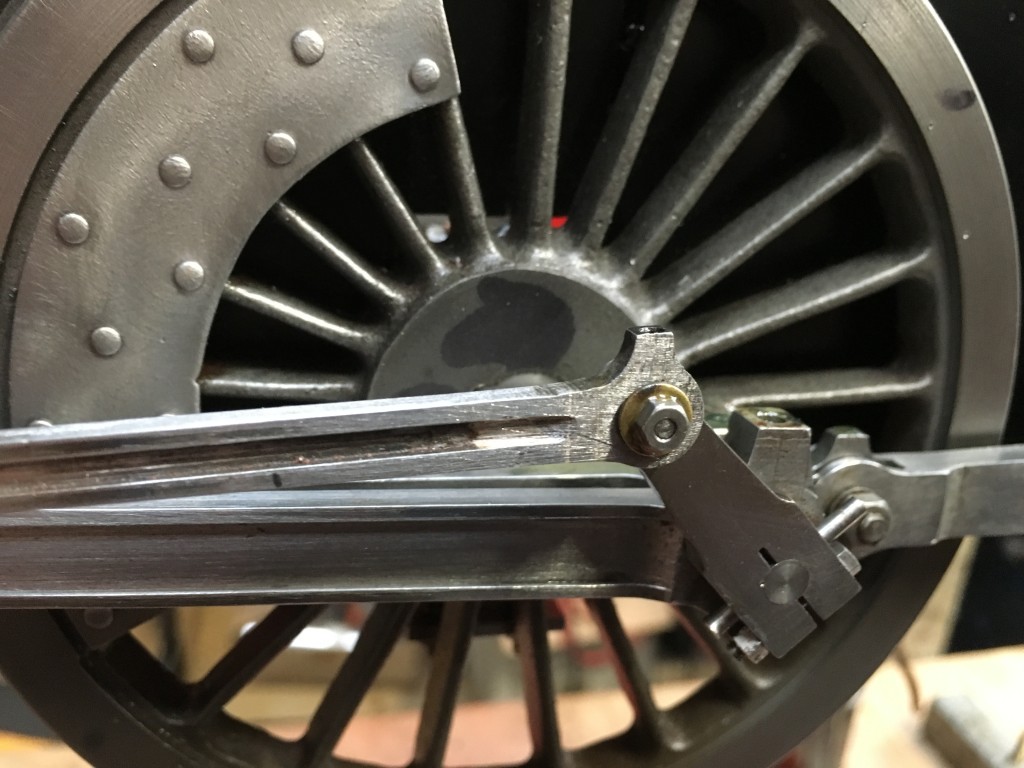
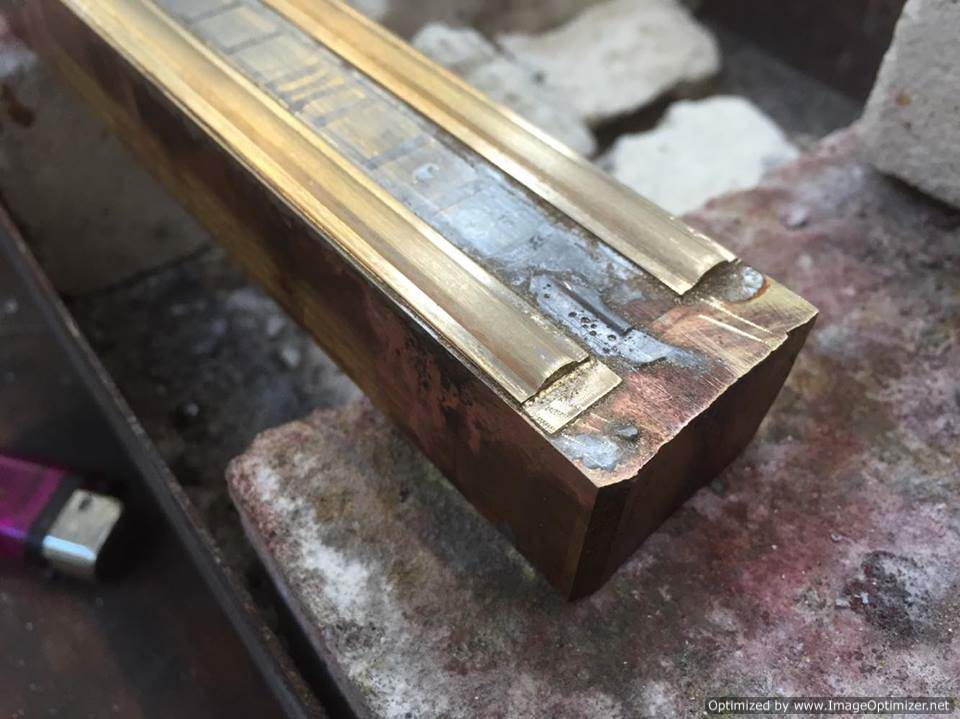
Next it was time to press the wheels onto the axles and re-assemble the valve gear. The return crank was set and we had to chop and extend the eccentric rod to get the timing to work as nicely as we wanted. If you look closely at the last of the 4 photos here you can see the subtle silver solder lines showing where we added a segment. It's obviously been cleaned up and nicely shaped since, so you can hardly see the join now.
The tender body went into works etch primer too.....

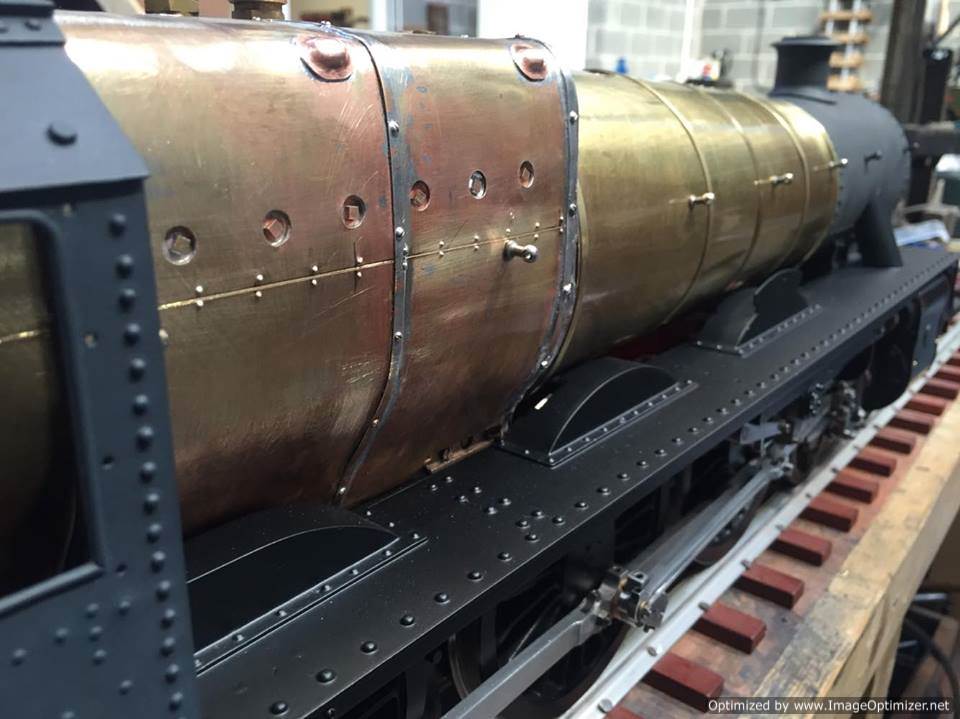
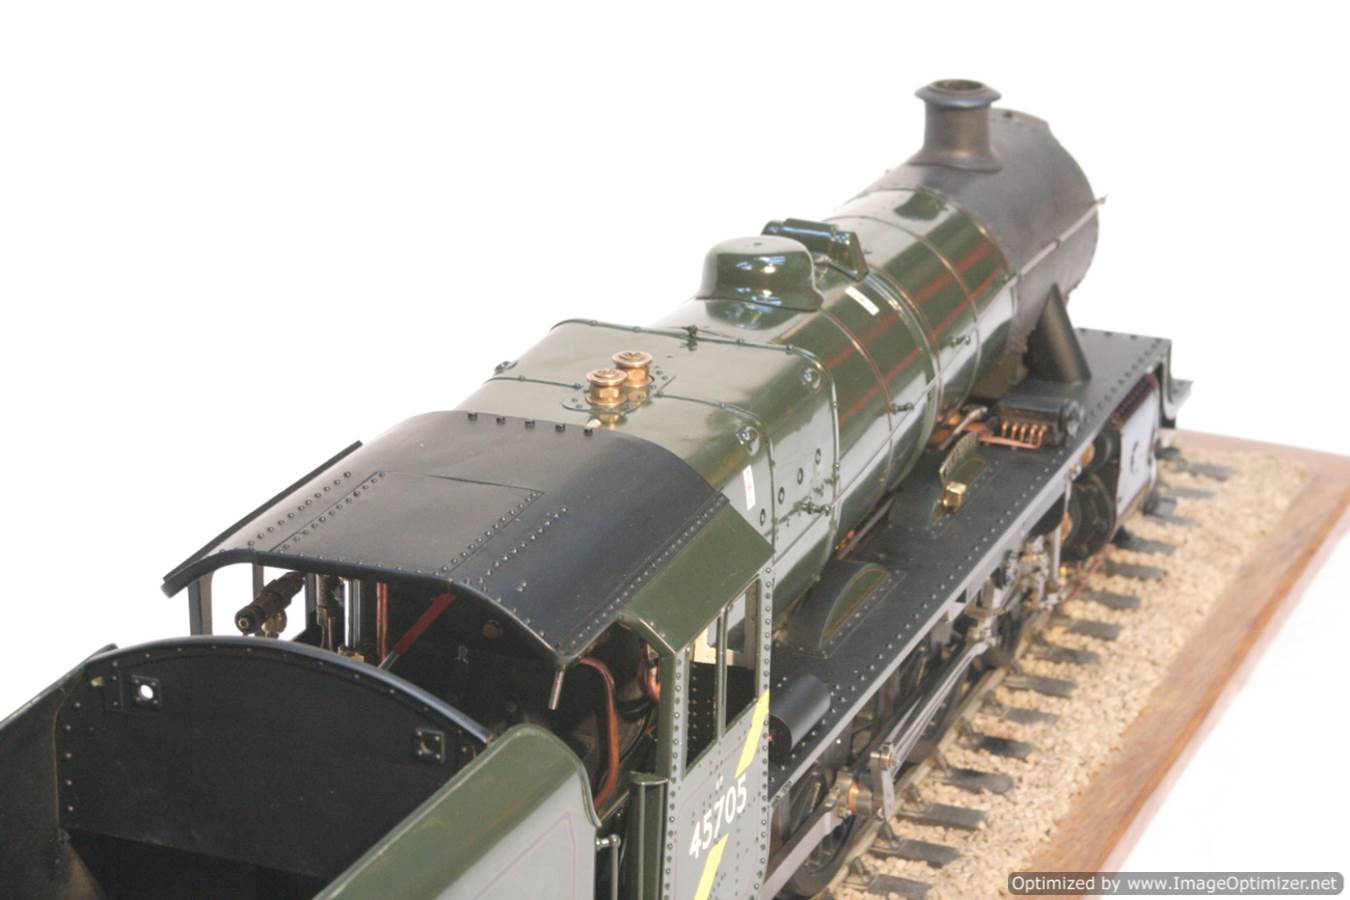
Well, next up now that the chassis is mechanically sorted and ready to go, it's time to sort out some nice detailing and paint for the bottom end. So here we have the new cylinder cladding to fit the more prototypical profile of the top edge of the cylinder block. (You may remember that the valve chest, being slide valve originally had a square and incongruous top edge) The wheels are also now finally in their satin black finish.
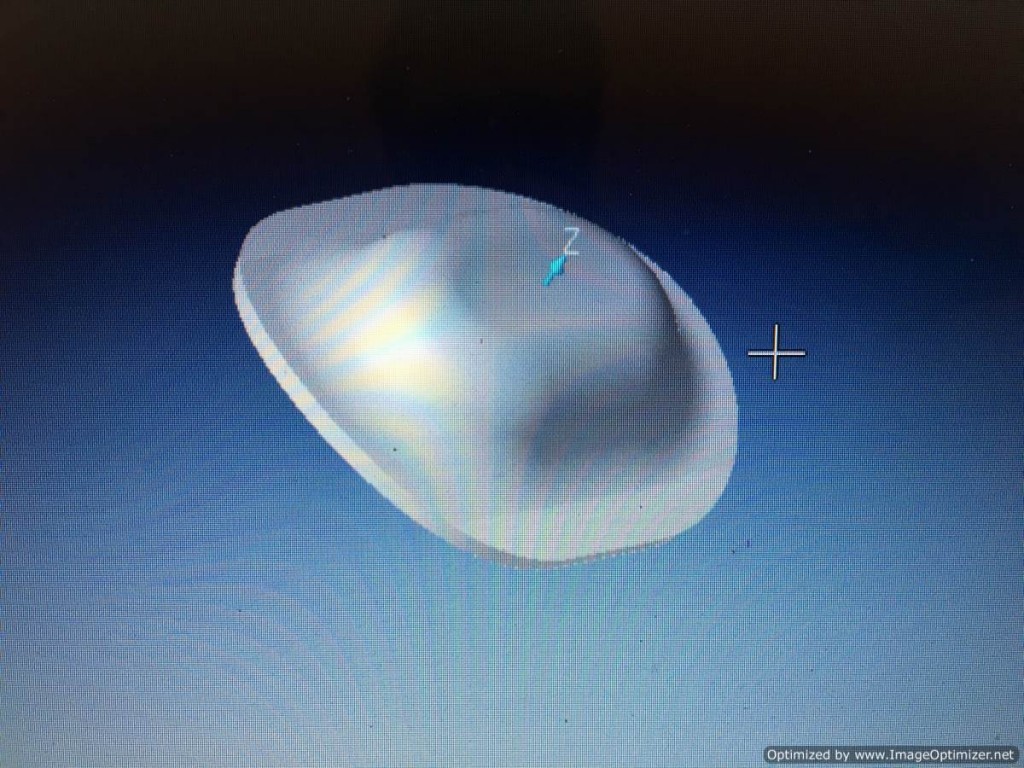
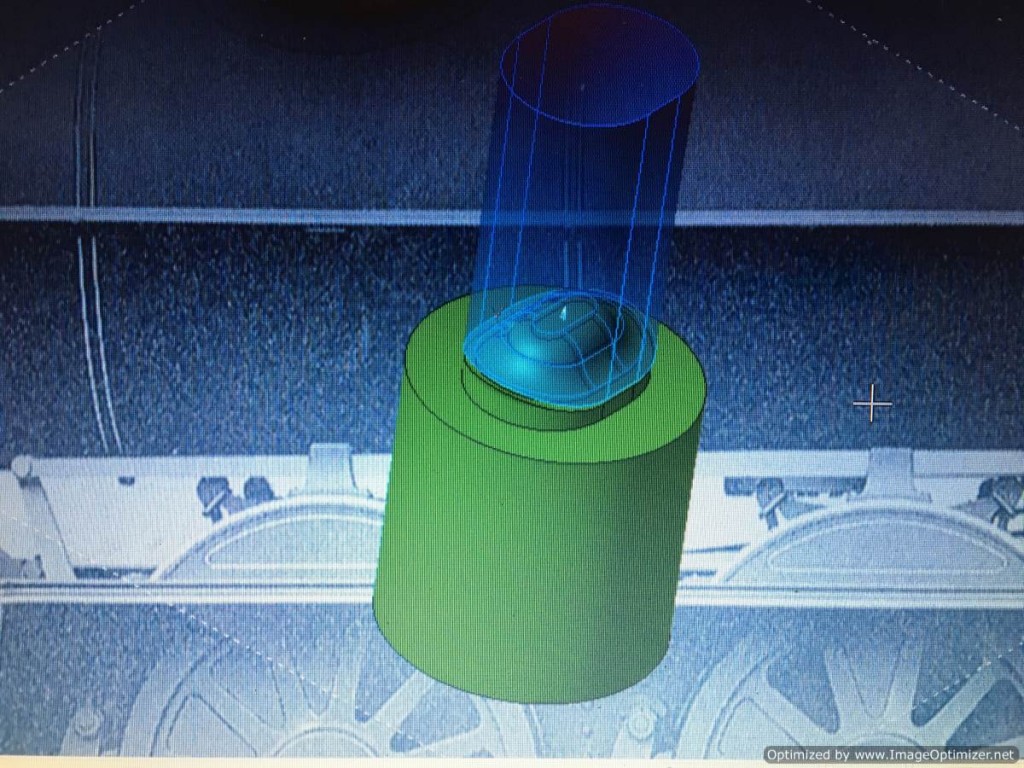
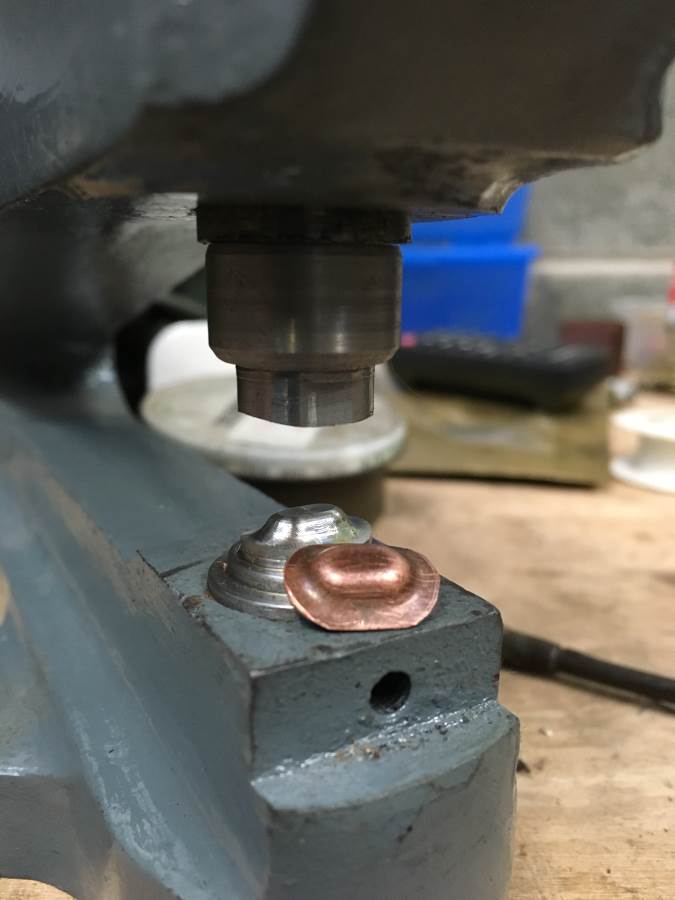
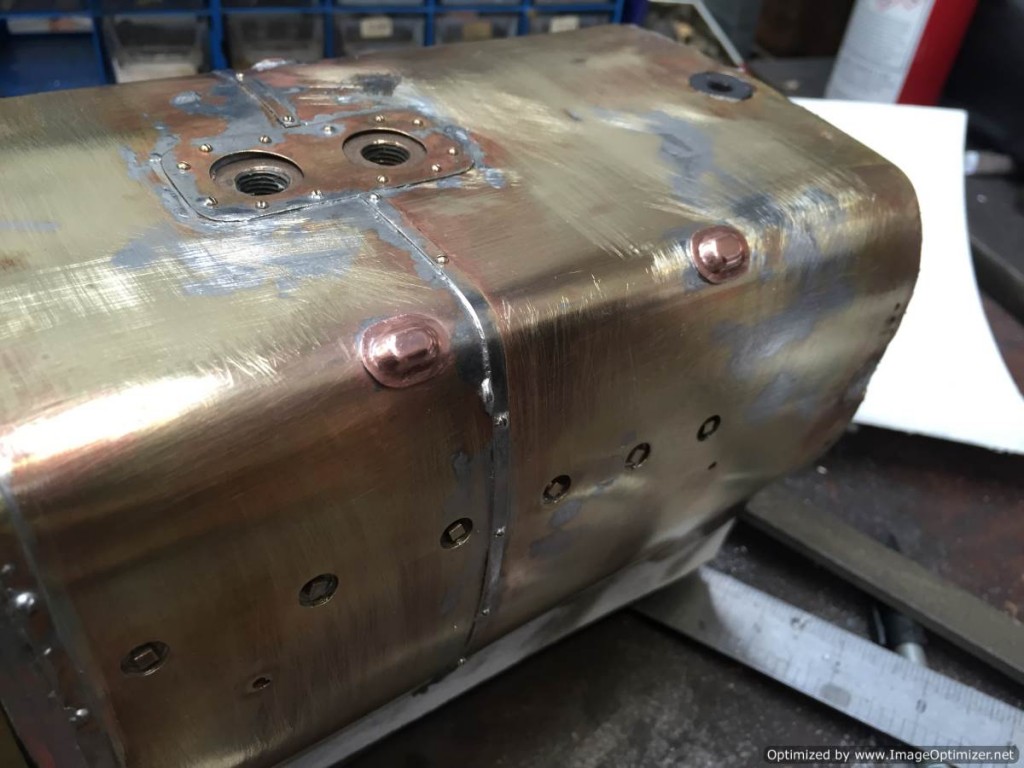
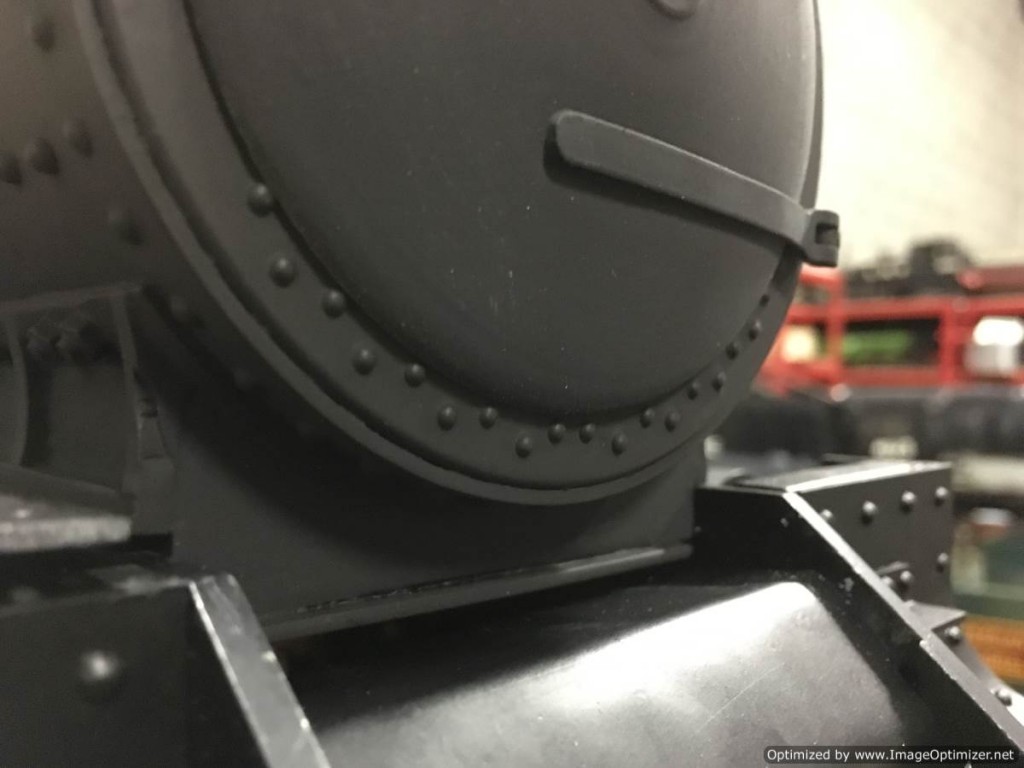
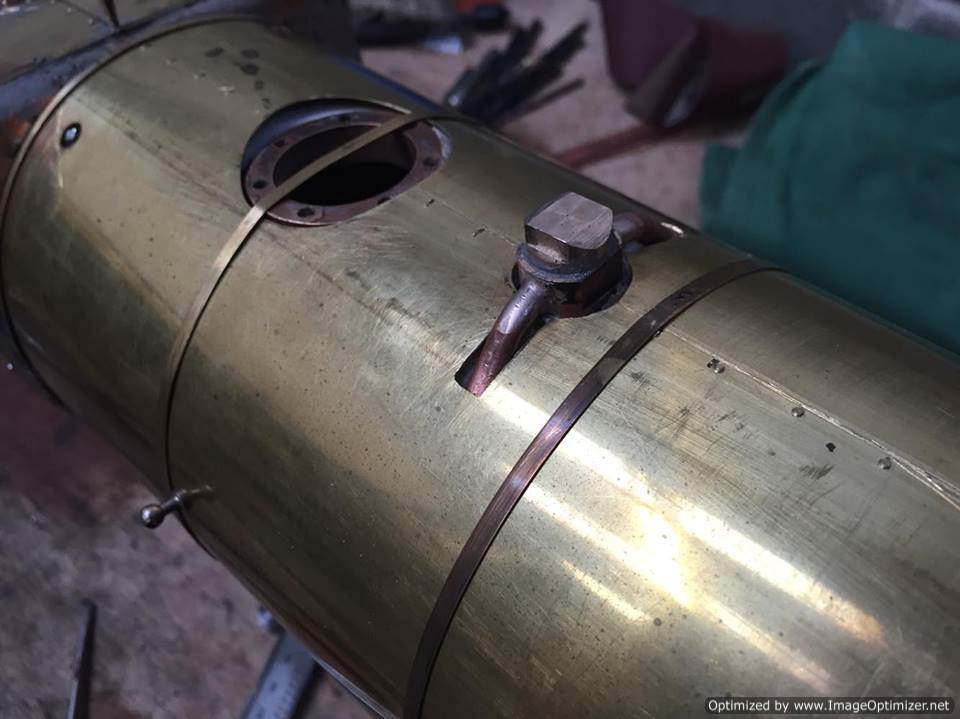
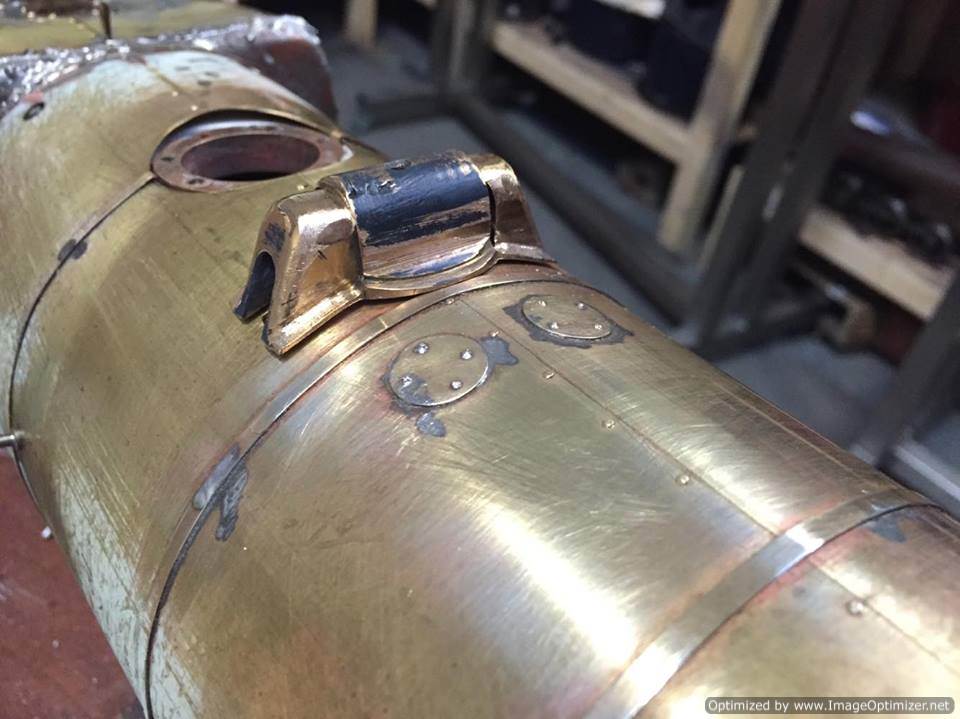
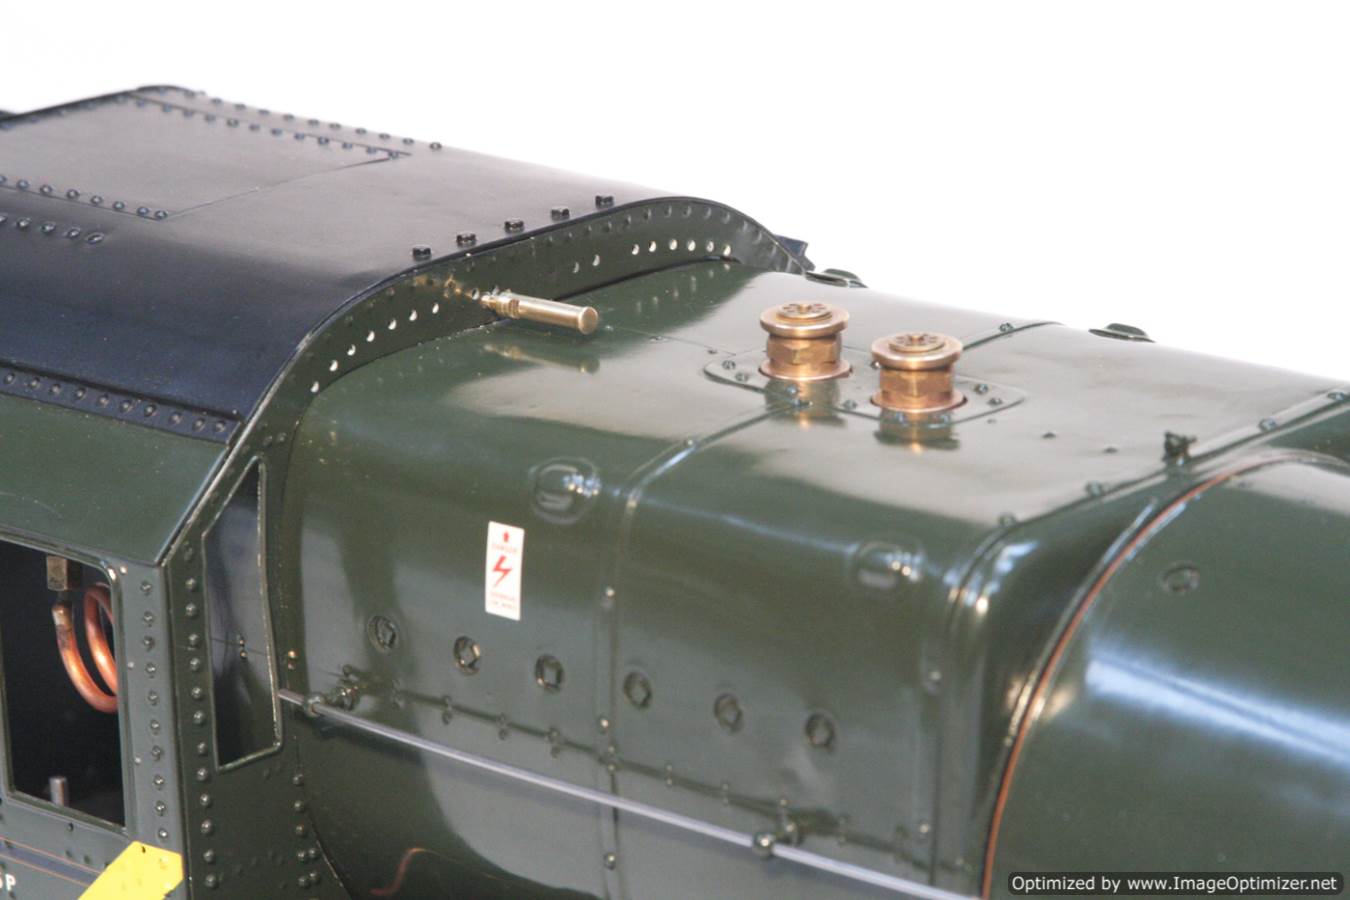
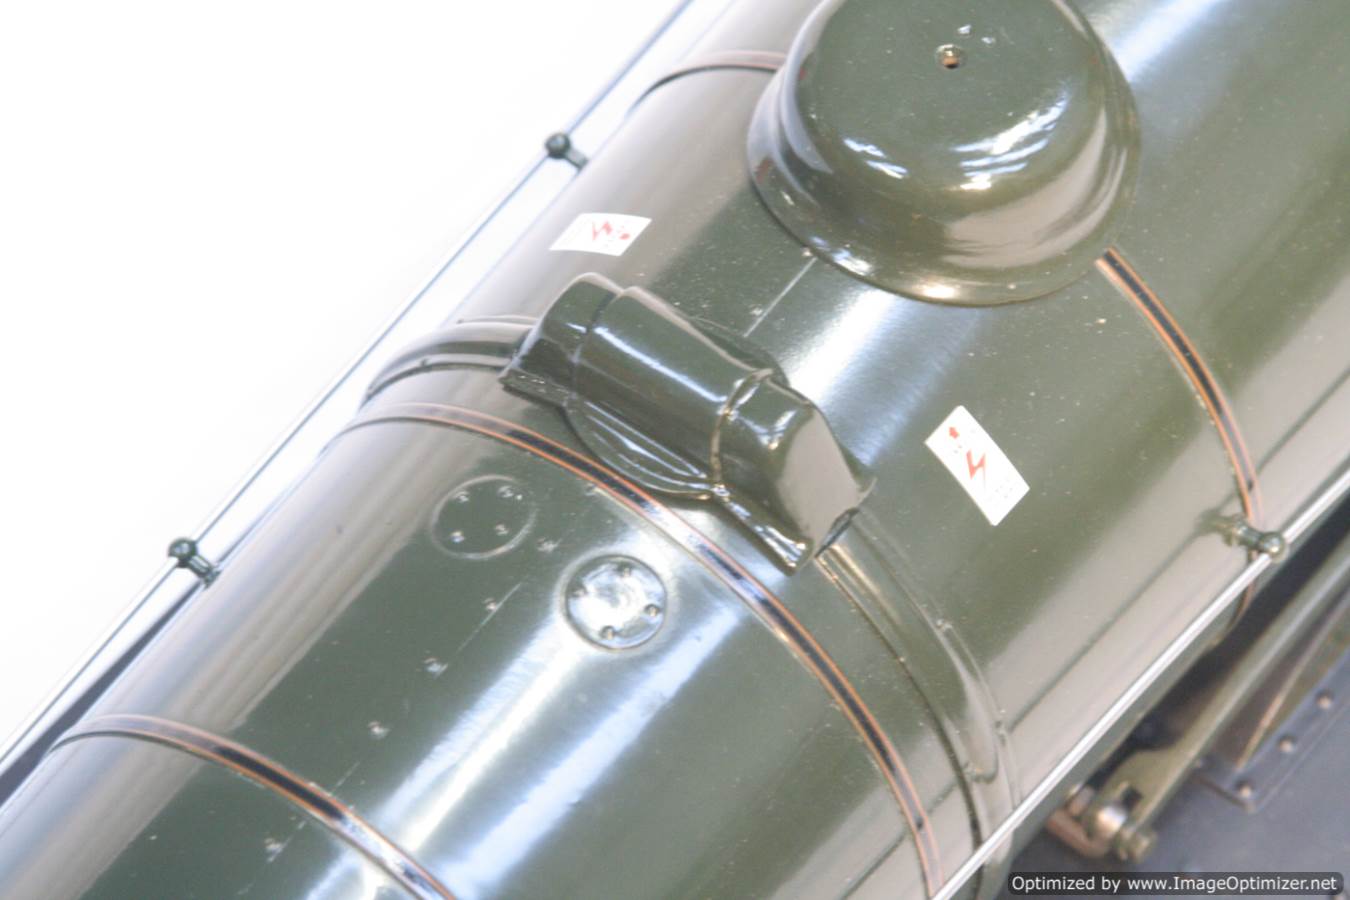
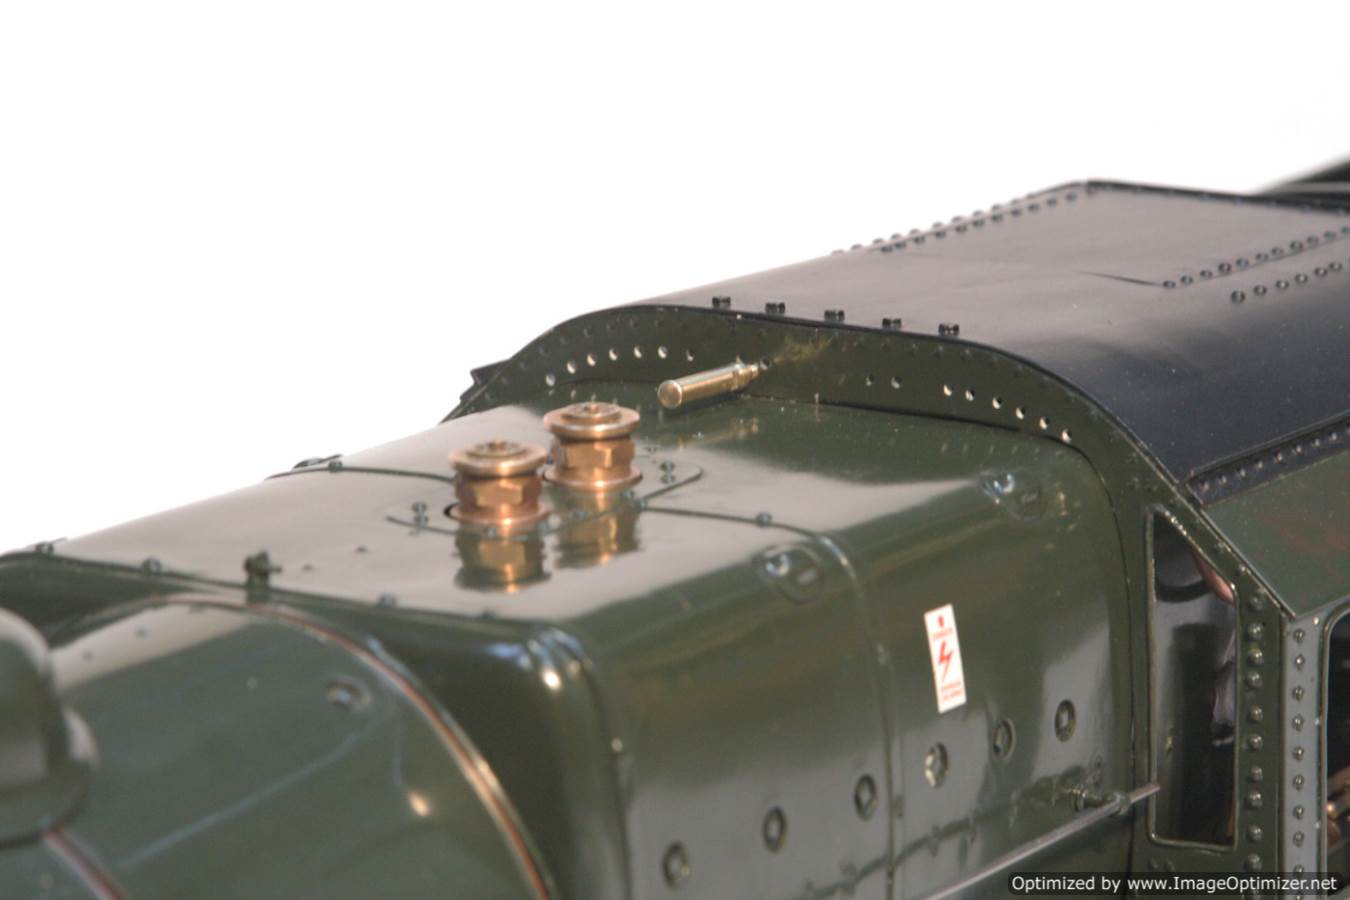
The top end benefited from considerable added detail and re-worked cladding. The main barrel cladding was entirely scrapped, and we've added detail such as the washout plugs, inspection covers and even the central split line with tiny bolt detail down the seam. The firebox cladding was extensively re-worked. The front edge was moved further back so that the radius could be eased off a little. It was quite sharp on the original loco. Again, washout plugs were manufactured and soldered onto the back face of the cladding (note we put them all on at different angles,..... irritating when you see a model with them all aligned). We made a press tool to make the top inspection covers, which turned out particularly well, and together with the split line and rivet detailing on the sides really finishes off the firebox detail.
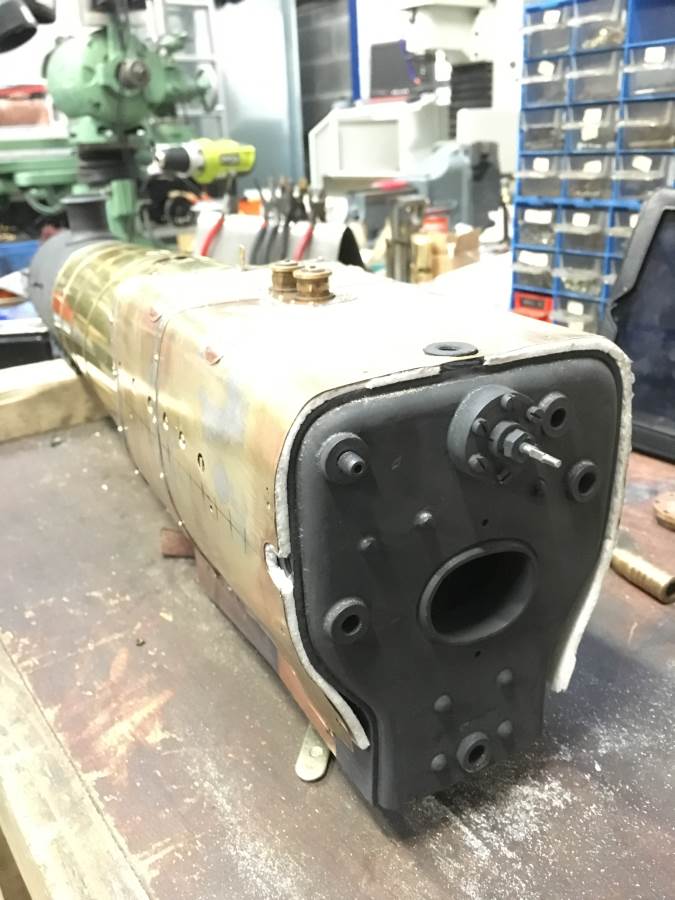
The top feeds were re-worked to run underneath the cladding. A massive improvement over the original loco...... and a close up pics to show it all coming together as we test fitted things to check all was well before painting.
..... and a sneak peak at the paint going on,.......
.....and the lining. nearly there now!

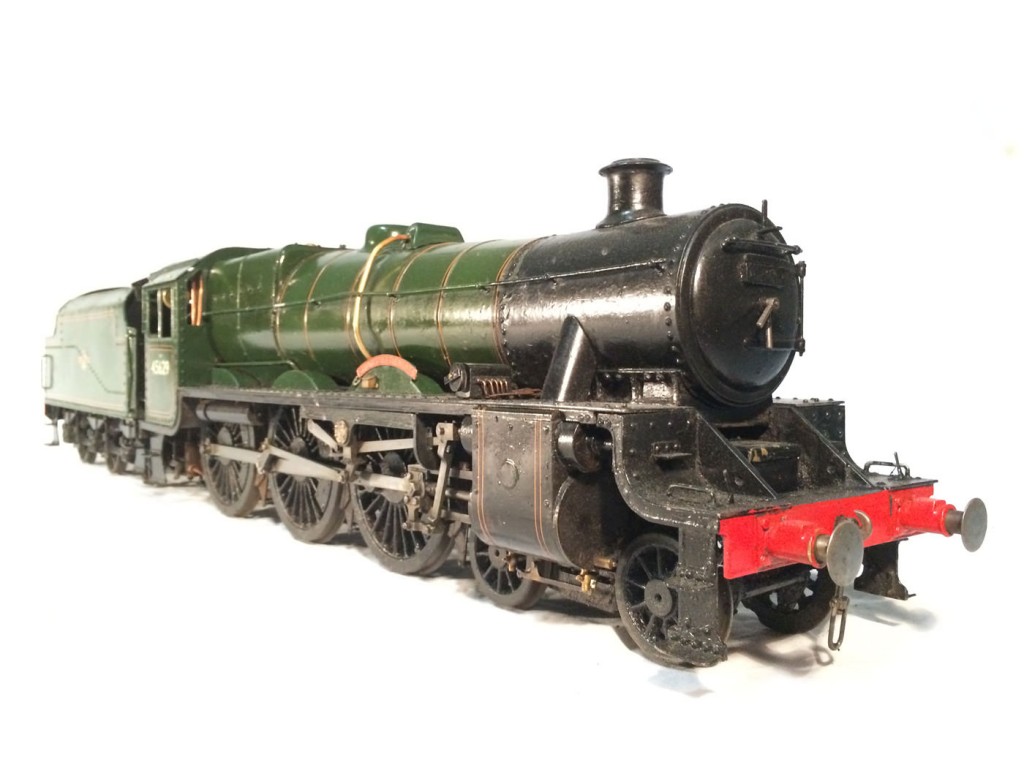
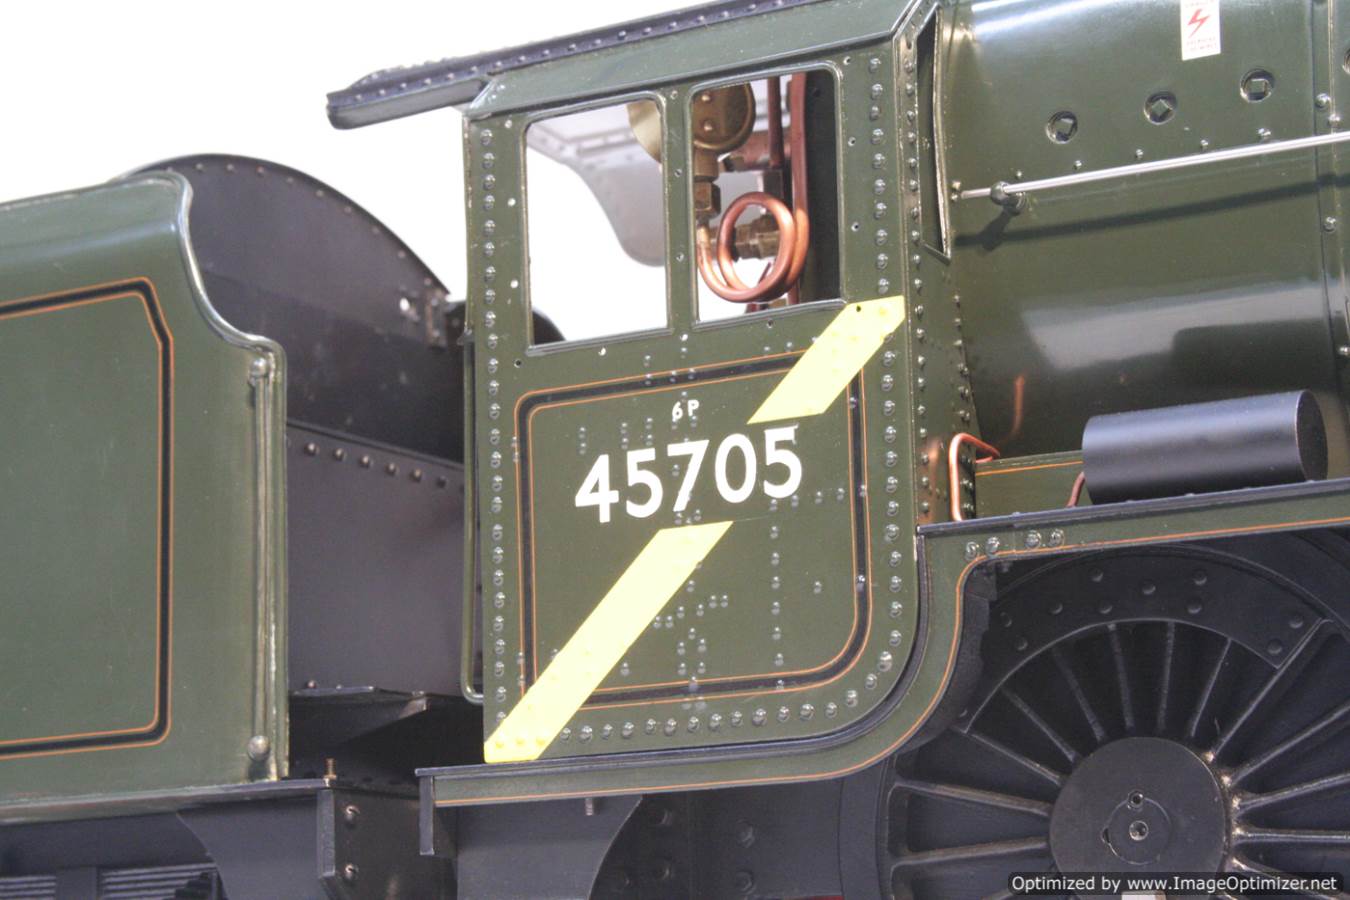
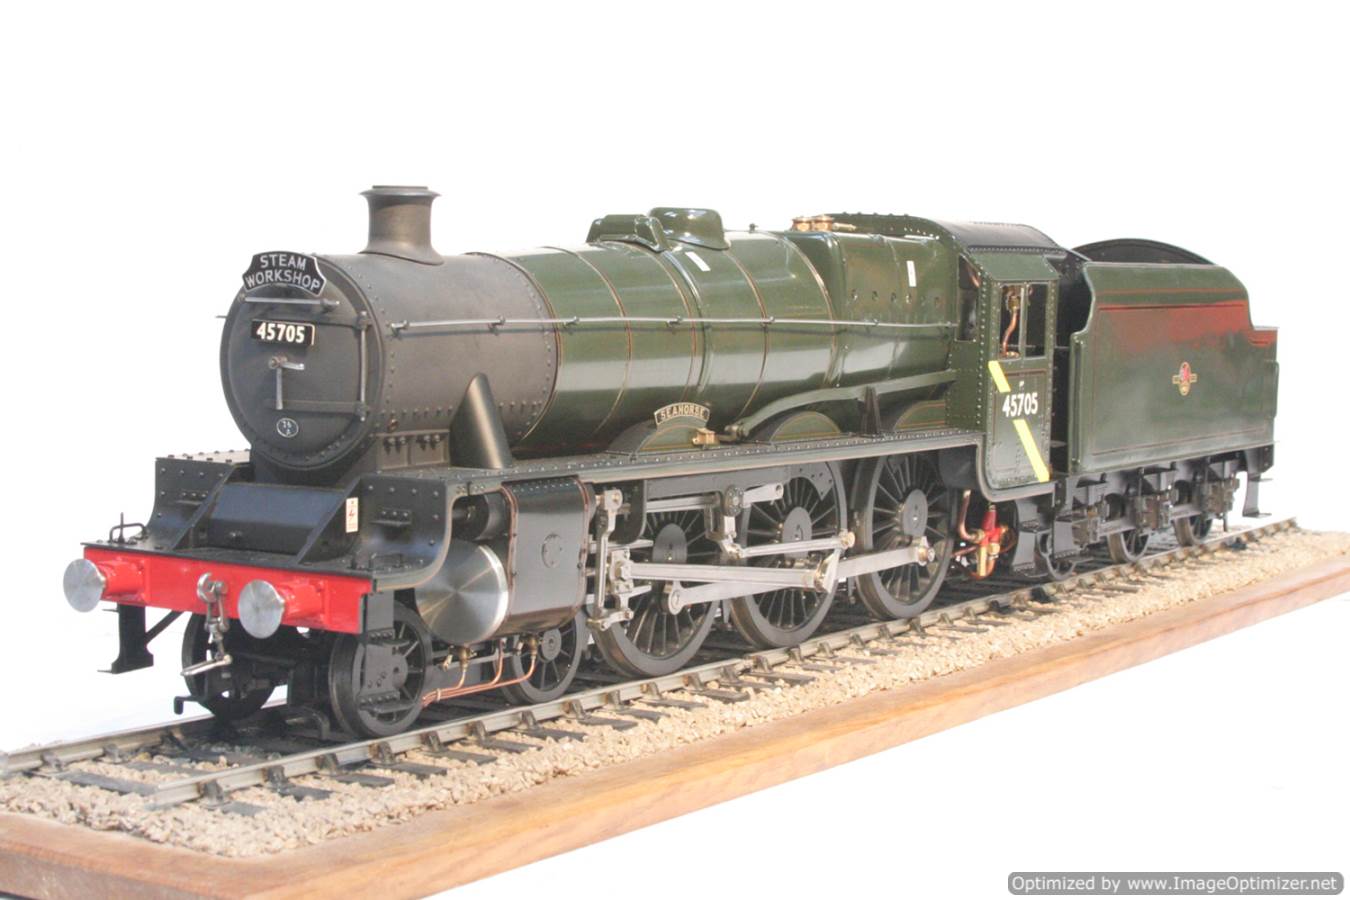
and then finally, a little gallery to show the finished model!
There will be a video to follow shortly of her first steam tests, but essentially that's the end of the restoration!
The End!
